“As we know, WordPress is free and open-source CMS that is written in PHP and linked with MySQL or MariaDB database. Also, it is one of the easiest, smarter, and more powerful platforms where you can easily able to create or develop websites with so ease. You don’t need to have the coding skills, easily by the ‘drag and drop’ functionality, you can create and give structure to your website. It has already installed tons of templates or themes which you can easily import and give a beautiful structure to your website.”
Installing WordPress on every hosting server is somehow similar. And through the following steps, you can able to figure out the main steps to install WordPress inside any server. Here, I am taking the example of Hostinger, a very cheap, trusted web hosting service provider company, even though, our ‘Baba Coder’ website is too hosted under Hostinger. And many of my client’s designed websites to are hosted under it. It’s simple, secured, and easy to use, and their customer service or chat service is too quick to respond.
As I am been the trusted client of Hostinger, and other web-hosting companies like- Bluehost, HostGator, WPX, WP Engine, HostWinds, etc. And I have an offer for my readers if you going to purchase any hosting plans through my particular links, which you can get just by clicking over them, then you can get up to a 25% discount from the original price in every plan. And if you purchase it through Hostinger then you can get up to a 40% discount.
Now let’s talk about the main steps by which you can easily able to import a beautiful portfolio website inside WordPress.
1. Firstly we need to access the WordPress login dashboard
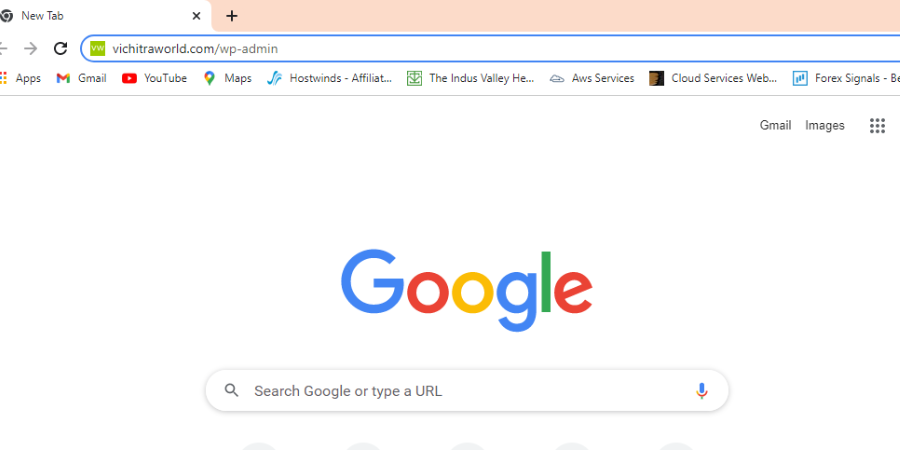
To quickly access the WordPress dashboard, inside the search URL bar, you need to search for the website URL followed by the /wp-admin and it will automatically redirect to the WordPress login dashboard.
2. Feed up the login details inside WordPress dashboard
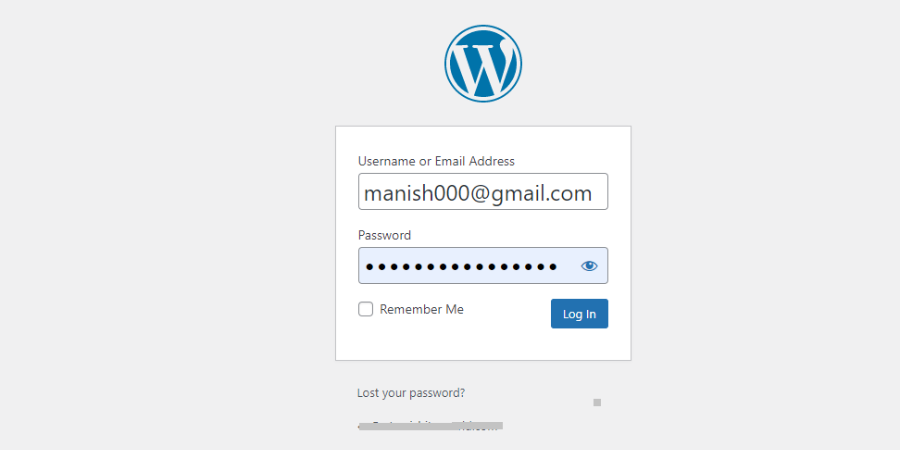
Quickly submit your WordPress login credentials to access the main WordPress dashboard. If in case you forgot your login password then you need to click on the Lost your password? link, and from there you can able to reset or revive your password.
3. Now we need to include the ‘Astra’ theme
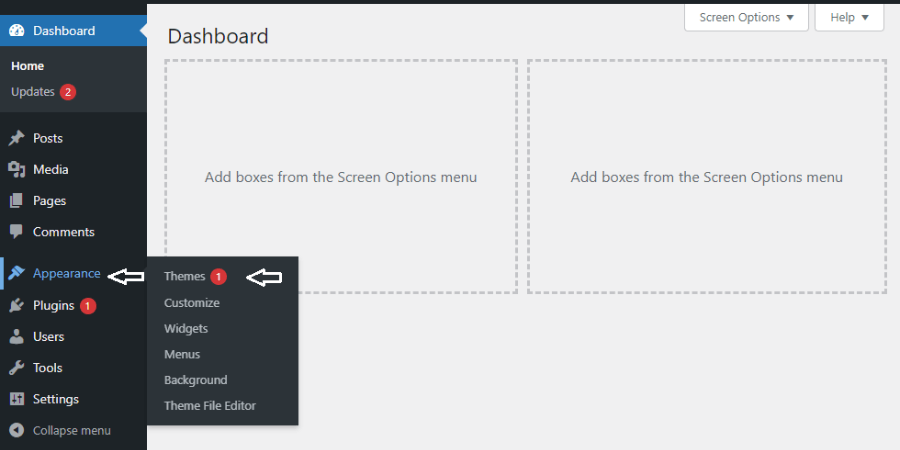
By default, WordPress installed any basic theme. But we need to install the ‘Astra’ theme, where we can able to import the amazing portfolio fashion designing website, so simply inside the WordPress dashboard click on the Appearance > Themes, to access the themes section.
4. Need to click on the Add New button to add different themes
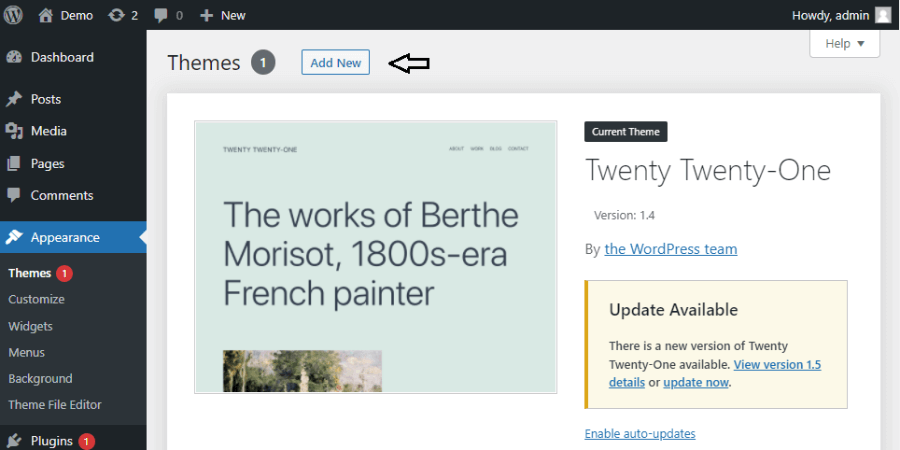
Click on the Add New button to install the ‘Astra’ theme and it will automatically redirect to the panel, from where we can able to upload as well as install different new themes.
5. Search for the ‘Astra’ theme and install it
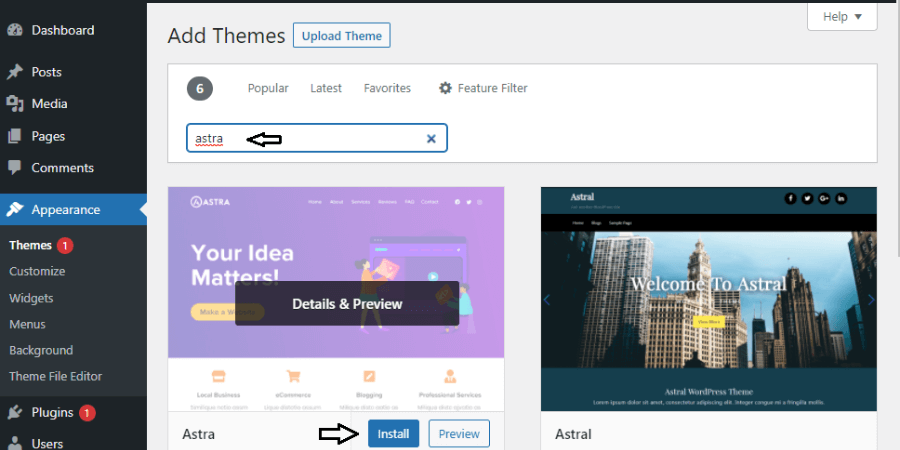
Simply inside the search panel, find the ‘Astra’ theme, and install it. But keep in mind, your theme must need to be Astra not Astral or nothing else from it check every spelling correctly.
6. After installing the Astra theme kindly activate it too
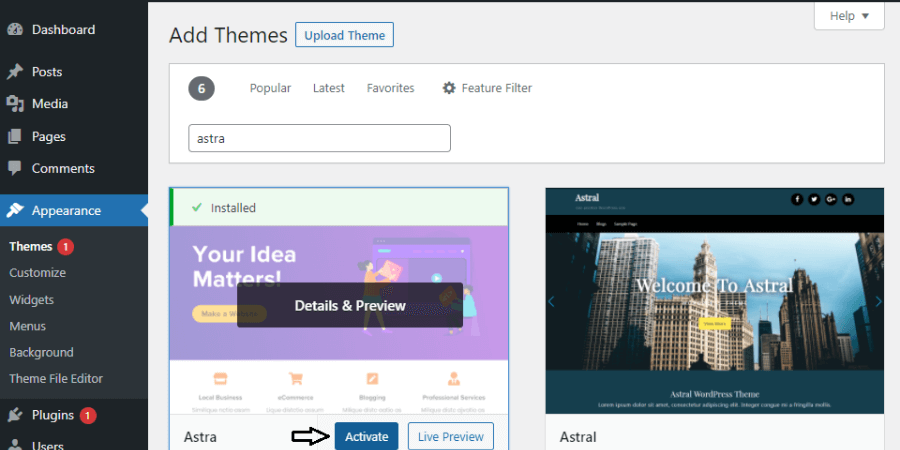
Click on the Activate button now, so that your default WordPress theme switch to the ‘Astra’ theme. Then you can also able to delete your default theme too.
7. Now add some important and required plugins
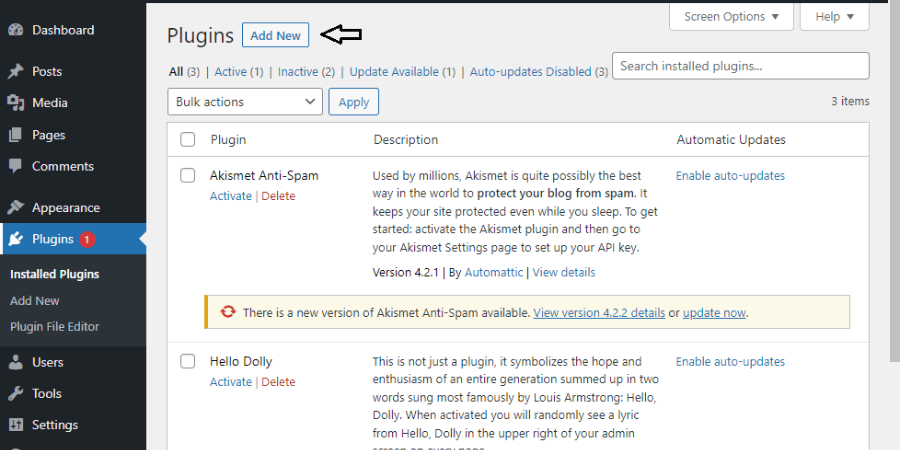
After the successful installation of the ‘Astra’ theme, now we need to add some important and required plugins which will help us in building or customizing our website. So simply inside the WordPress dashboard go for Plugins > Add New.
8. For website builder need to add required Elementor or etc plugins
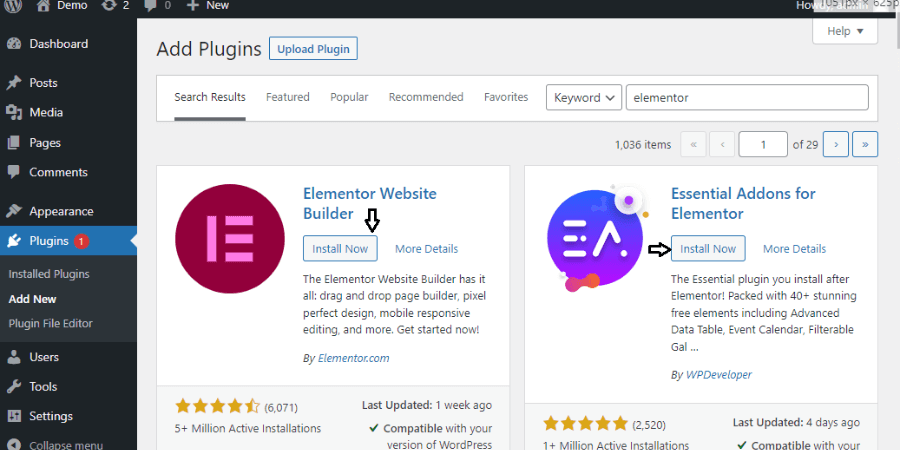
As Elementor is been a popular plugin that is used to give structure to our webpage, it has a beautiful ‘drag and drop’ functionality with amazing editing capability. I personally liked it a lot and it’s quite easy too. You can also download other website builder plugins like- Beaver Builder etc.
So simply, search for the Elementor and install it, also install some more required plugins like- Essential Addons For Elementor or etc. Also if you want the free version of Elementor pro, then click here- Download Elementor Pro, and simply upload it after clicking on the Upload Plugin button.
After successfully installing all the plugins, now activate every plugin so that you can start using these plugins.
9. Again go back to your Astra theme and click over the theme details
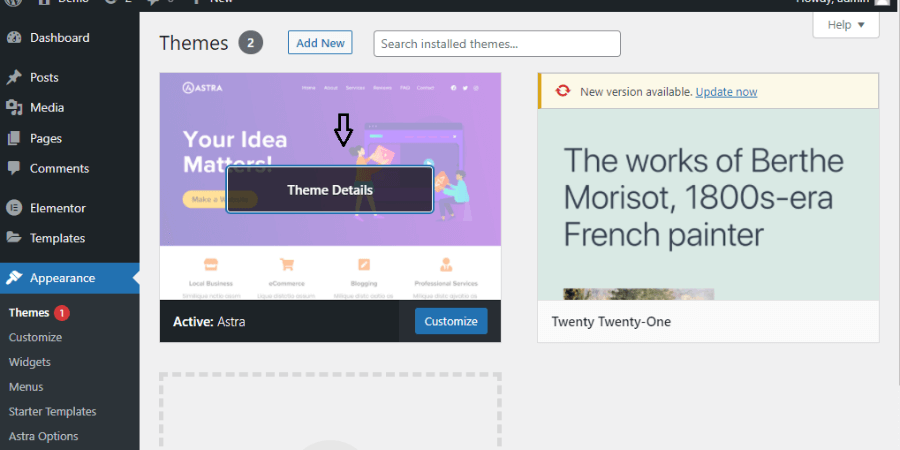
So after installing and activating all plugins, now you need to move back to your ‘Astra’ theme which you have downloaded a little while ago. So simply grab the theme by clicking on the Appearance > Themes from the WordPress dashboard. Now simply take your mouse pointer over the ‘Astra’ theme and automatically a box will open with ‘Theme Details’ written on it, as shown in the image too. You need to click on it.
10. Now you need to access the Astra options inside the theme.
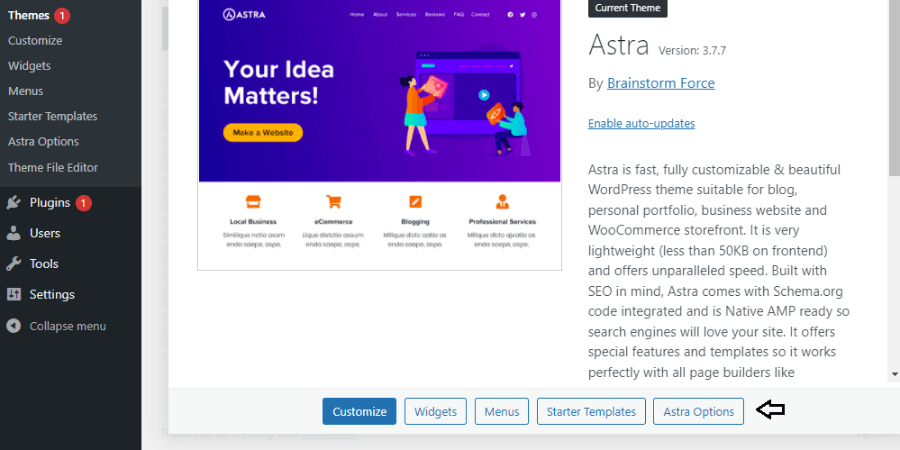
After clicking on the theme details, you will be getting the brief details of the ‘Astra’ theme like- Customize, Widgets, Menus, Starter Templates & Astra Options but you need to simply click on the ‘Astra Options’ button, as shown in the image too.
11. Install the Importer Plugin now
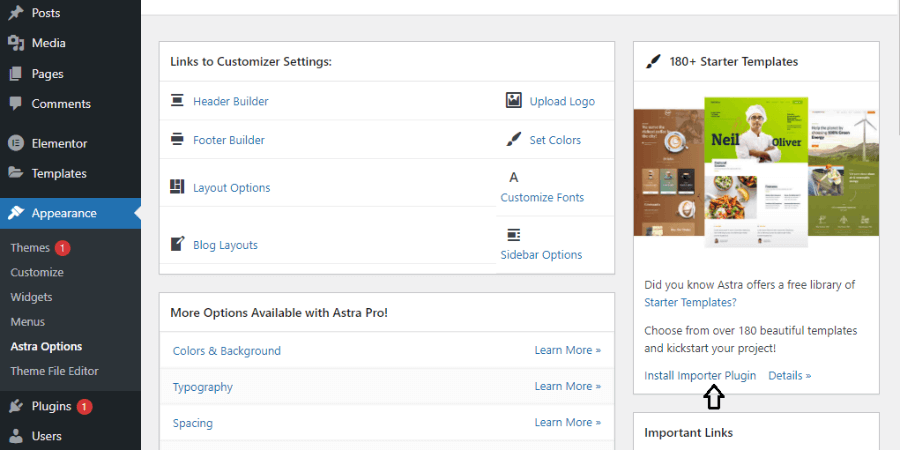
Here inside this panel, you can able to customize different layout options too. The ‘Astra’ theme provides over 180 beautiful templates and to import these templates you just need to install the Importer plugin so that you can able to import the website from those beautiful templates.
And to install it, you need to simply click on the Install Importer Plugin, which will be on the right side, and from there you need to activate it too.
12. Now simply click on the Build Your Website Now button
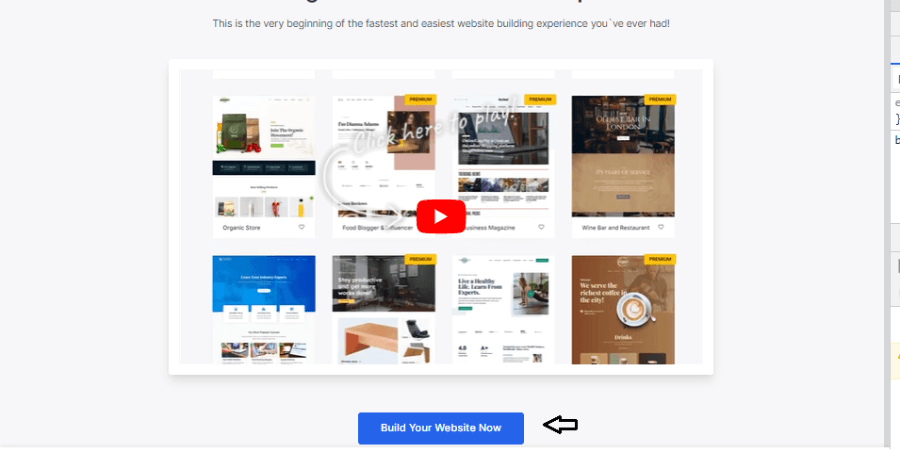
After successfully installing and activating the ‘Importer Plugin’, automatically it will redirect you to the new page where through the YouTube medium they had briefed about their services. You can either check the video or simply click on the Build Your Website Now button.
13. Select your page builder now
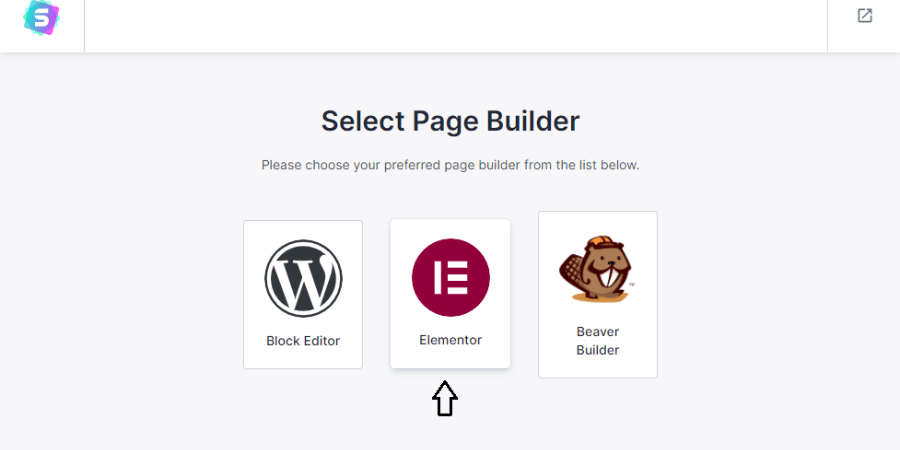
As we have installed the Elementor plugin for constructing or customizing our page, here we need to simply select the Elementor. But if you are comfortable with any other page builder option then select that particular option.
14. Search for the fashion designer portfolio inside the Astra theme templates now
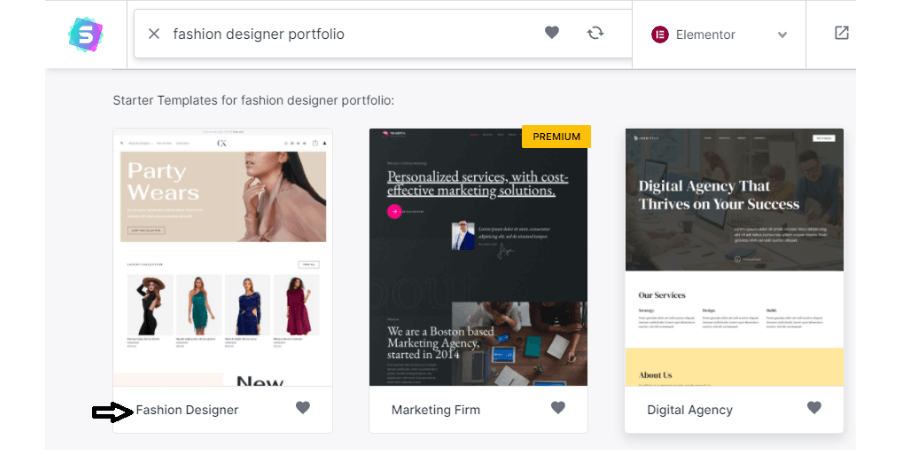
After selecting the page builder, you will be redirected to another page, where you can able to check different templates provided by the Astra theme. You can able to view the different templates by just clicking over them. Also, you can able to choose your desired template.
But for now, I am searching for the Fashion Designer Portfolio inside the template search panel and then I will be clicking over it to use this particular template.
15. Upload your desired files, logo here

As we know it is been a dummy template. So here, according to your requirements, you need to customize your site by adding any particular files or by uploading your particular logo. Also, you can able to customize it later on. So don’t worry. Here I want the default template only, so I am just clicking on the Skip & Continue button.
16. Customize your template setting now
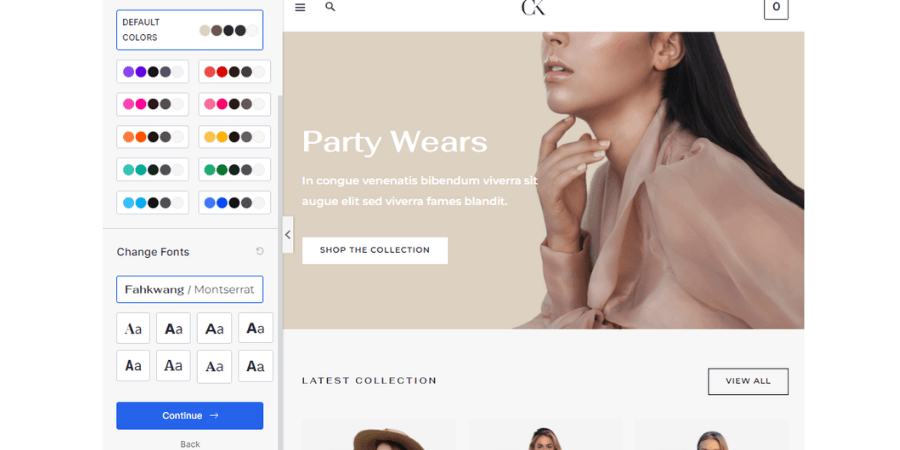
Here, also, you can able to customize your template settings, like the color settings, font styles or etc. If you want it then customize it otherwise simply click on the Continue button.
17. Fill your basic details here
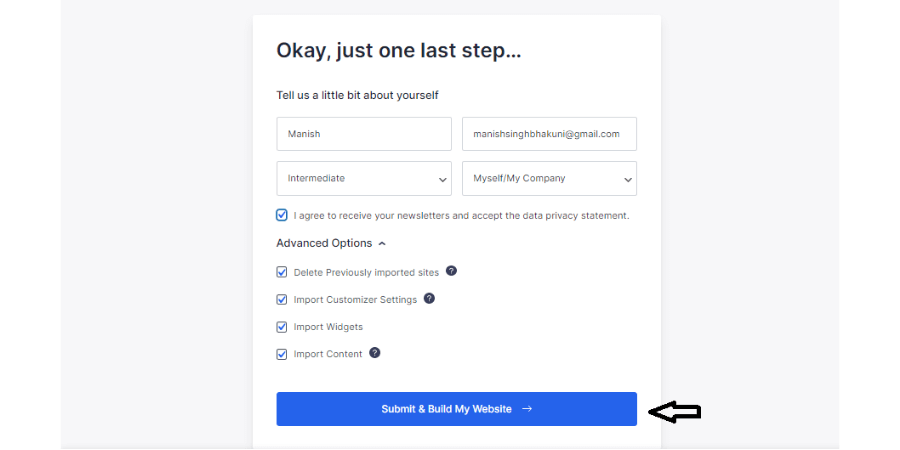
It is the final stage. Here you need to simply fill in your basic details like- your name, email, website creating purpose, website developing experience. So simply fill-up the details. If you want to receive the Astra theme newsletter then check on the ‘I agree to receive newsletter’.
Make sure, below the Advanced options, every checkbox must need to be checked as it is a must to import the whole template. Then simply, you need to click on the Submit & Build My Website button.
18. Now you need to wait untill the template been imported
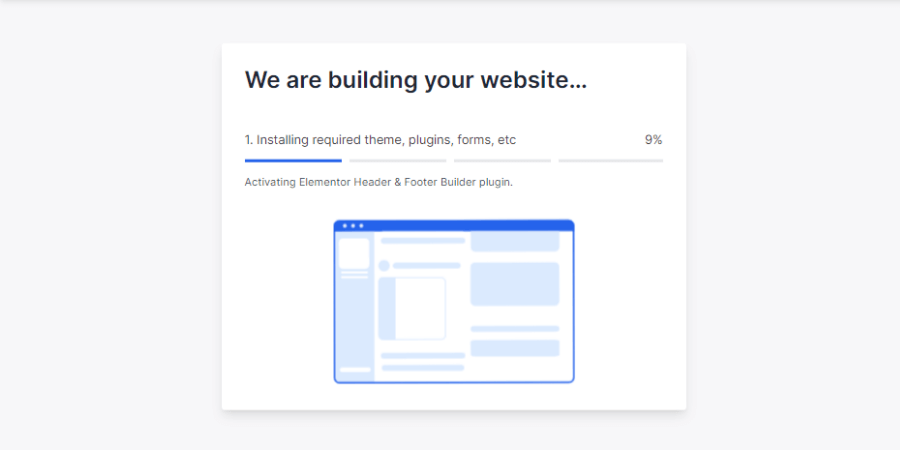
Now you need to stay calm and wait until the whole content, images, plugins, menu, post and etc. is imported. You need to stay still until the process comes to 100%.
19. Now check your website

As soon as the importing process is done, automatically you will get the Congratulations message, as shown in the image too. Inside that Congratulations message, you can also able to get the View Your Website link, find and click it.
20. Check the dummy site content or image are imported well or not

After successfully importing the template, you can come back to your website URL and can check your website now. It is now having the working functionality and a beautiful fashion-designer-themed website.
Conclusion-
As we know, we had imported the dummy template, so we need to customize our website content, images, post and etc. according to our store or website. But yes, we have the structure now, and simply, we can able to build our page using the Elementor or your preferred page builder. One more thing you need to understand is the template that you have imported automatically downloads all the required plugins.
In our upcoming post, we will be understanding the steps by which we can able to construct the Ecommerce Website creation through WordPress in just 10 minutes, with every working functionality.


