“As for every beginner Website Developer, there is some hidden and precious happiness when the very first time his/her developed website comes live on the Internet. As the live website can be accessed anywhere in the world just by typing the website domain or name in the URL search bar. Also on every device, your website going to run, people can able to read your content, know about you, and other purposes you can also able to fulfill too, from there.
And today in this post, we are going to talk about the steps by which you too can able to live your website. Also, what will be the configuration steps, how to name your website, and where to store your website document files (including HTML, CSS, JS &.PHP, or WordPress files), everything we are going to cover here.
But before going further, we need to understand the requirements that is been must to live any kind of website, whether it is WordPress designed website or custom designed website.”
What is needed to make your site live?
To host or to live any website, we need any space in any type of super computer or server, where we can keep our all website document files, under a particular address or URL. And that computer or server must need to have network connections all over the world so that the website can be accessed anywhere in the entire world.
In short, we need the following things:-
- Hosting– any storage where we can keep our website document files.
- Domain– any address or the name of the website, where we can able to access our website. like – babacoder.com in my case.
Nowadays, there are tons of hosting providing companies, which provide all in together.
In the following steps, I am hosting the website from the Hostinger platform, which is one of the best, most powerful, easy-to-configure, secured, cost-efficient & reliable hosting and domain, providers. Also, in their premium hosting plans, they are providing free domain and SSL (forced to HTTPS protocol which keeps your website safe), too. I personally recommend and myself use Hostinger for my personal websites as well as for my client’s websites. Hostinger also provides the WordPress installer by default, and through this, you can able to install WordPress here in just a blink of an eye. To know more about the WordPress installation inside Hostinger, find out this post, https://babacoder.com/blog/how-to-install-wordpress-inside-the-hosting-server/.
If you too want to live your ideas or website, then you can avail this benefit too, and even at a more discount price by using our link- https://www.hostg.xyz/SH78T. Also, you can buy the hosting from other providers too such as Bluehost, HostGator, WPX, WP Engine, HostWinds, etc., and almost the process of living a website is similar inside every hosting plan. To know relevant and straight Pros and Cons of different hosting provider companies, must visit our this post- Pros & Cons Of Different Web-Hosting Companies
So, let’s start the procedure now:-
1. Search For The Best Hosting Plan
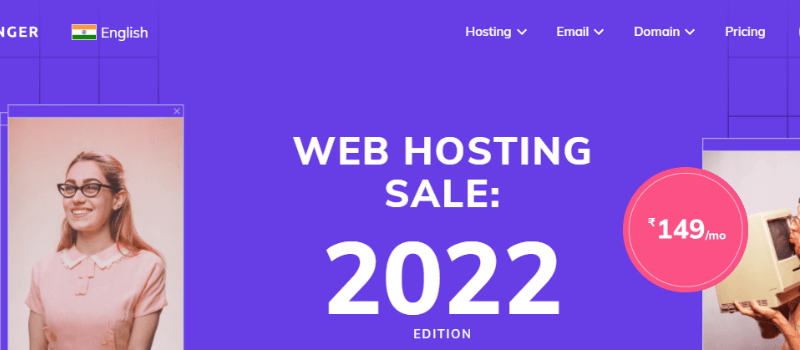
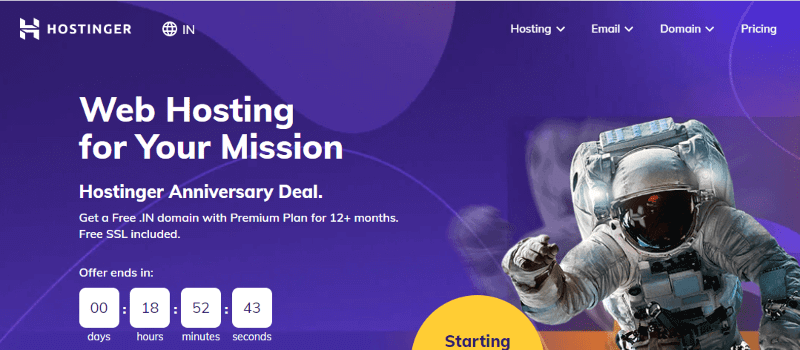
As we have discussed above, you can purchase the hosting and domain from other hosting provider companies too, but here I am going now with the Hostinger right now, you can too purchase the hosting, domain, and SSL here at a very budget-friendly price. Just click on the above image or grab this link- https://www.hostg.xyz/SH78T, and it will automatically redirect to the official website of Hostinger.
2. Now check and read every hosting plan carefully and then complete the order
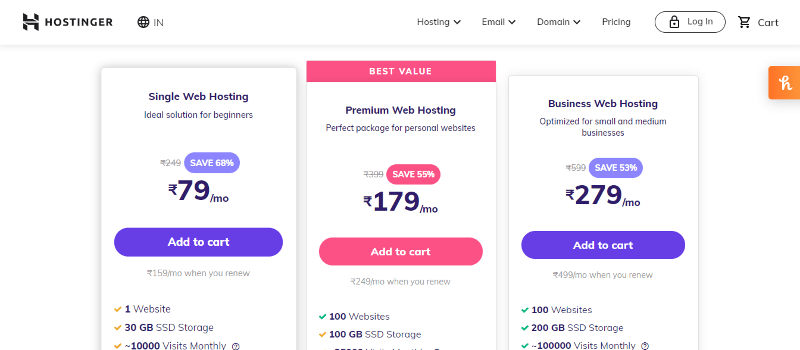
After accessing the official website of Hostinger. Simply, scroll down the page and check over their different hosting plans. Below every plan, you can able to read out the features of the different hosting plans. Simply read the features and you need to buy any one of the plans to get started.
For a premium, decent, and secured hosting plan, I recommend you to go for the Premium web hosting plan, as it has really good features, and you can able to get the free SSL & domain with it.
After selecting your hosting plans click on the Add to cart button.
3. Complete Your Order-1st Step
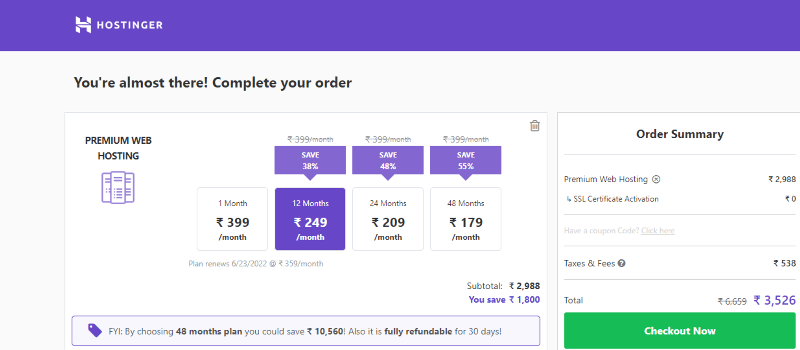
After finalizing the plan, you will be getting the dashboard on the top, from where you can opt for the plans and the time period too for how many months you are availing or purchasing the hosting plans. I suggest you go with the 12months plan, because after one year if you are able to do good on your website then definitely your blog or site may need the upgraded plan. And on the right side of the dashboard, keep checking the order summary too.
4. Complete Your Order-2nd Step
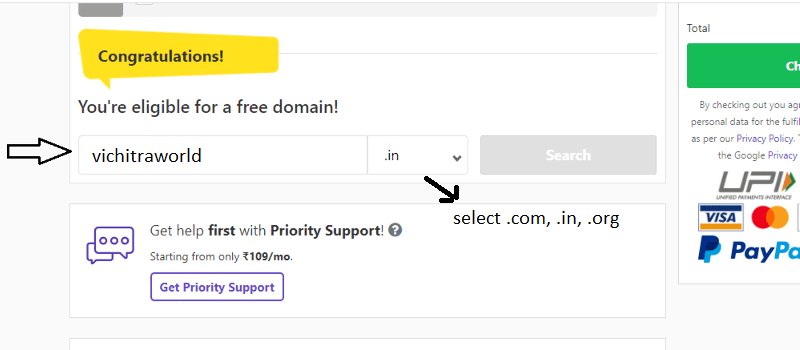
On the same dashboard or page, after selecting the hosting plan months, scroll down a little bit. You can able to see the domain (address of the site or blog) picking process for your site or blog, in your premium and business hosting plans, you can be eligible for getting the free domain, but in the Single web hosting plans of Hostinger, there you need to purchase it separately. So check the availability of the domain name according to your niche and must include the well top-level domain (.com, .in, .org, etc.). I used .com because, through this domain, my site can able to get high search results worldwide. But according to your niche or topic you can go ahead with the other top-level-domains too like .in, which represents India, if your site or blog is having services limited to India, then you must go ahead with this country-level domain, and more search results you will be getting from India. The same is with .au, which represents Australia. So you just need to finalize your domain very wisely.
5. Complete Your Order-3rd Step
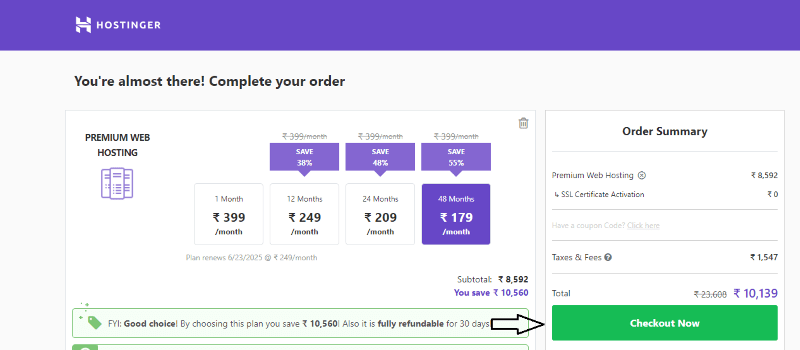
Now after selecting the time period and domain name, check on the right side of the dashboard under Order Summary. Must check your purchases and bill and then simply proceed to checkout.
6. Complete Your Order-4th Step
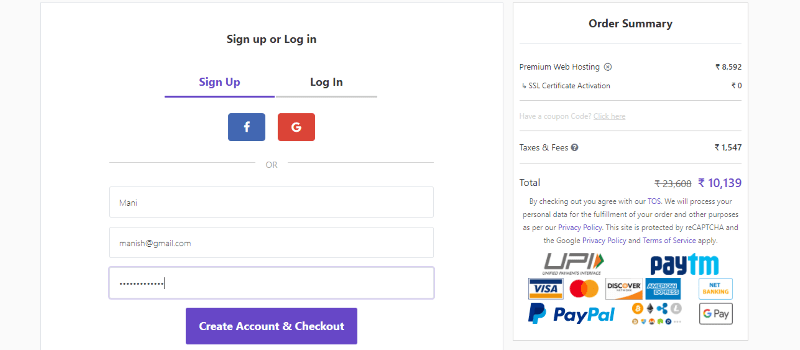
As soon as you click on the checkout button, they must be asking you to sign-up or log in to your account inside their panel, so if you have an account go login inside, and if not, then simply create an account, or you can join through Facebook or Google Account too. And also just by your name, email and password you can create your account too. So the choice is yours but must remember it, as it will be your account details too.
7. Complete Your Order-5th Step
Now, after creating or login account, you will be getting different payment gateways including PayPal, Credit or Debit Card, Net Banking, Paytm, Google Pay, etc. simply select any payment option then fill in details and do the payment part here.
As soon as you will be done with the payment part, then you can simply check your hosting plus domain inside your Hostinger account.
8. Now login your account inside the Hostinger now
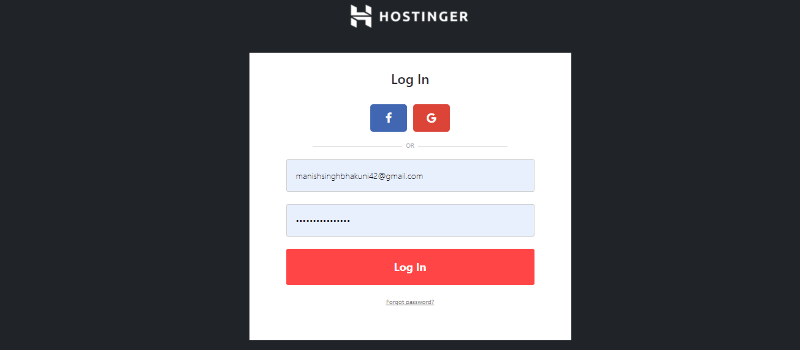
After purchasing the hosting and domain, now you need to log in to your Hostinger account. If you are confused about how to log in to the account, then simply again return back to the official site, and as shown in the image above just click on the login button. Or if you purchase the hosting from Hostinger, then to login inside the Hostinger, click here on this link- https://www.hostinger.in/cpanel-login. Just fill in the details and access the dashboard.
9. Manage the required hosting inside the dashboard of your account
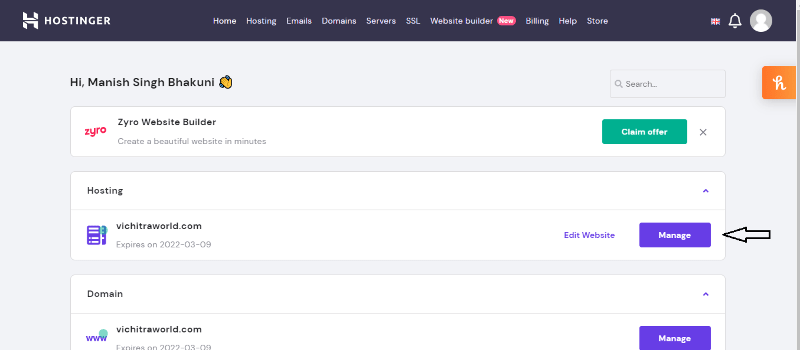
As soon as you log in to your account, you will be getting your hosting and domain details, as shown in the image. You can have or purchase multiple hosting and domain. And simply inside the required or decided hosting, you need to click on the Manage button.
10. Now in your hosting account dashboard, find the Files section
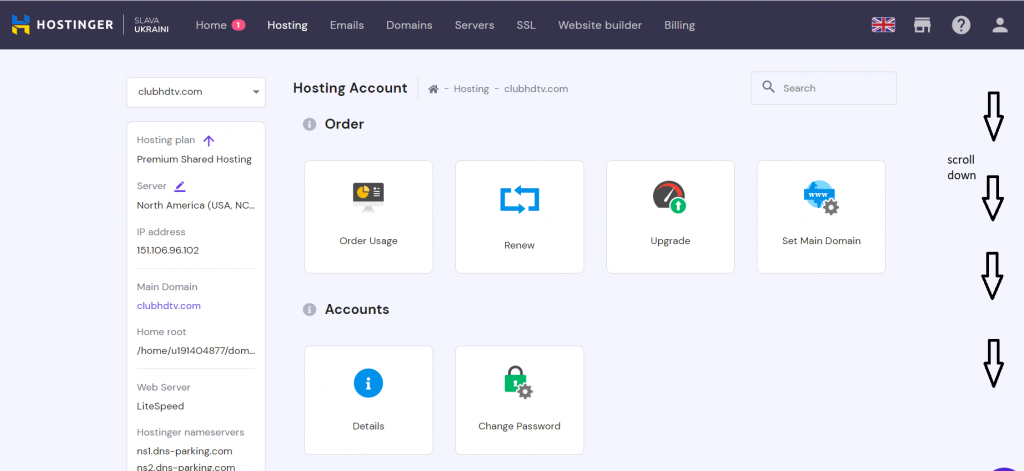
You will be inside your hosting dashboard now, where you can see your order status, account status, e-mail creation, Website, Files, databases, etc.
You just need to go inside the Files section and here you need to find the File Manager, just scroll a bit and you will find it.
11. Under the Files section click on the File Manager
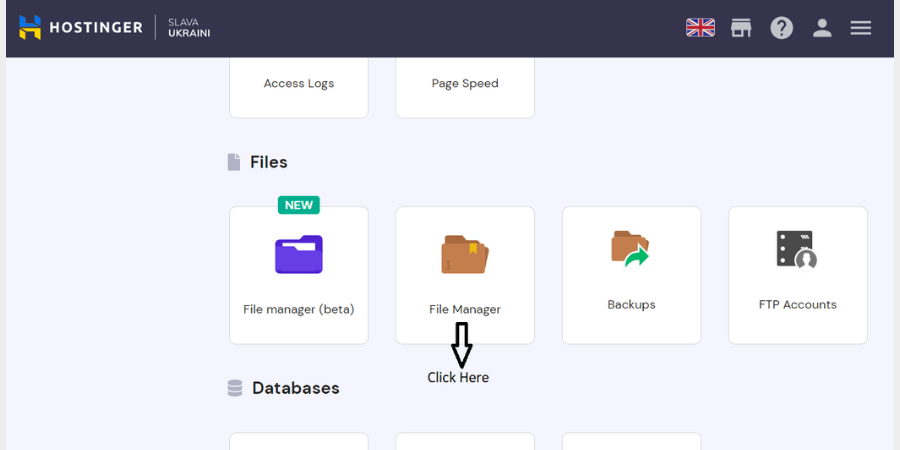
Inside the Files section, simply you will get the File Manager option, click here, and inside it, you can able to keep or access your document files.
12. Need to access the public_html folder and click on it
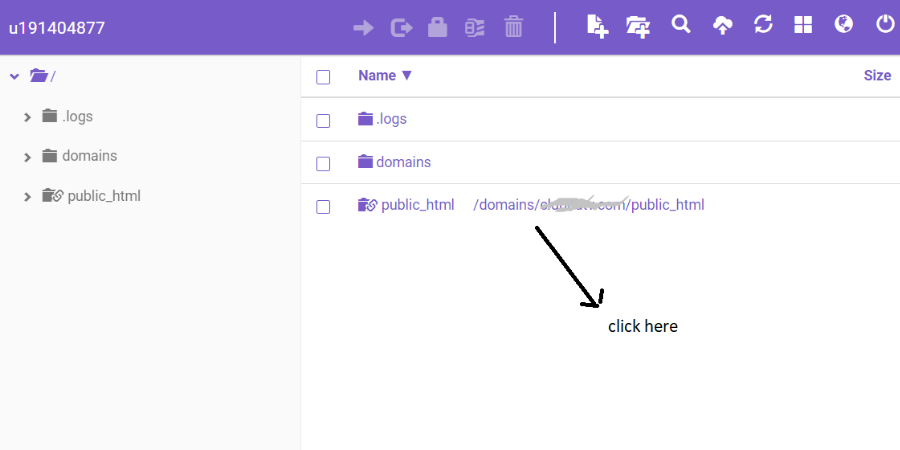
Inside the File Manager, you will be accessing the folder naming ‘public_html‘; inside this folder, you only need to drop your website document files. Not only with Hostinger but with other providers’ panels too, you need to find the same ‘public_html’ folder and there only your whole document will be kept.
13. Upload or Place here your any .HTML, .PHP, .CSS, .JS or Document files
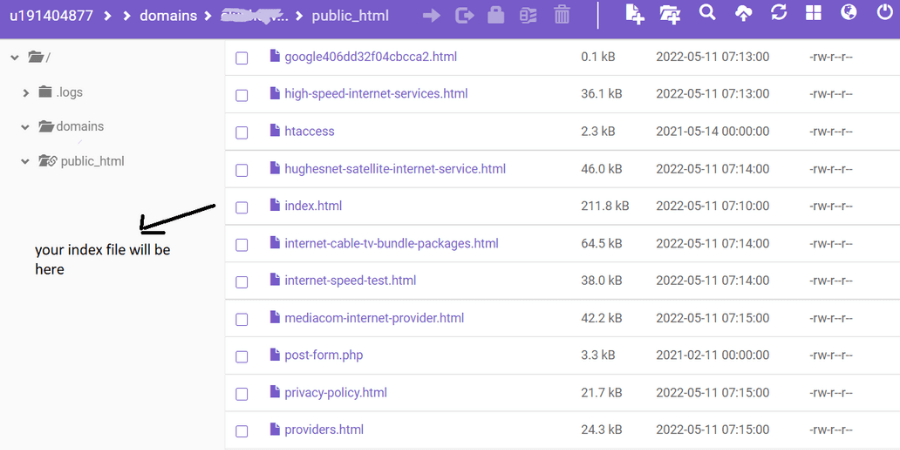
Here you can place any document files. As in the image too, we have uploaded every different linked website page here.
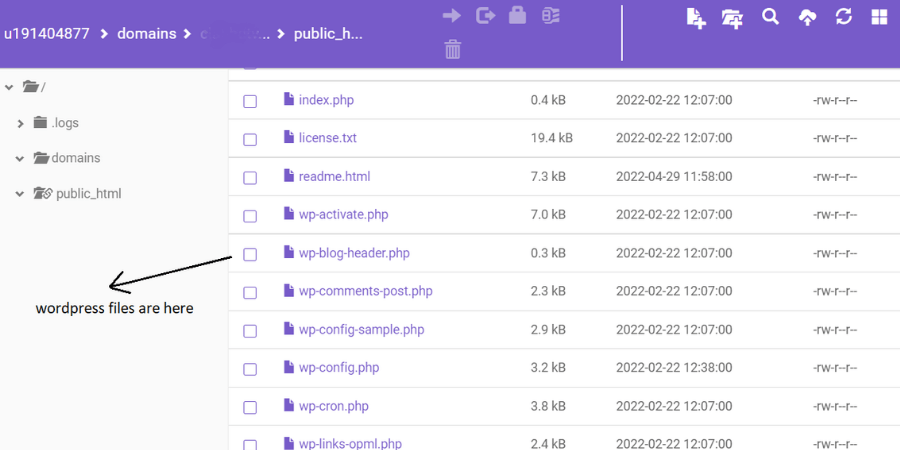
The same goes with the WordPress files too. As soon as you successfully install the WordPress, your whole WordPress or wp files you can access inside the ‘public_html’ folder only.
14. Now check your purchased domain or paste your website URL inside any Search Browser
Now, that we have done everything, we need to paste our website URL or the domain name which we have purchased or specified for our website inside Google or any search browser and try to access our website. Although it’s an exception if your site takes some extra time otherwise within a couple of minutes, your website has been live.
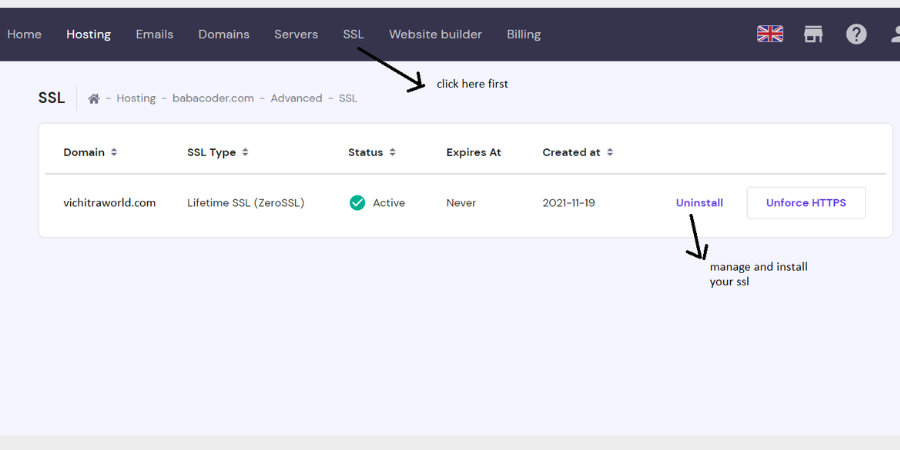
Also, you can easily able to install the Hostinger by accessing the SSL settings from the header, then manage it and install SSL for your current website or domain.
Conclusion-
So, we have understood each and every step by which we can able to live our any website inside Hostinger but the above-mentioned steps are anyhow been same for every other hosting providing companies. If you are too planning to purchase any hosting then must check out our links, as you will be getting definite discount prices from the links- Hostinger, Bluehost, HostGator, WPX, WP Engine, HostWinds, and also every mentioned hosting provider are been trusted hosting providing companies.
If you have any queries regarding anything, then feel free to comment below, I will surely help you out.


