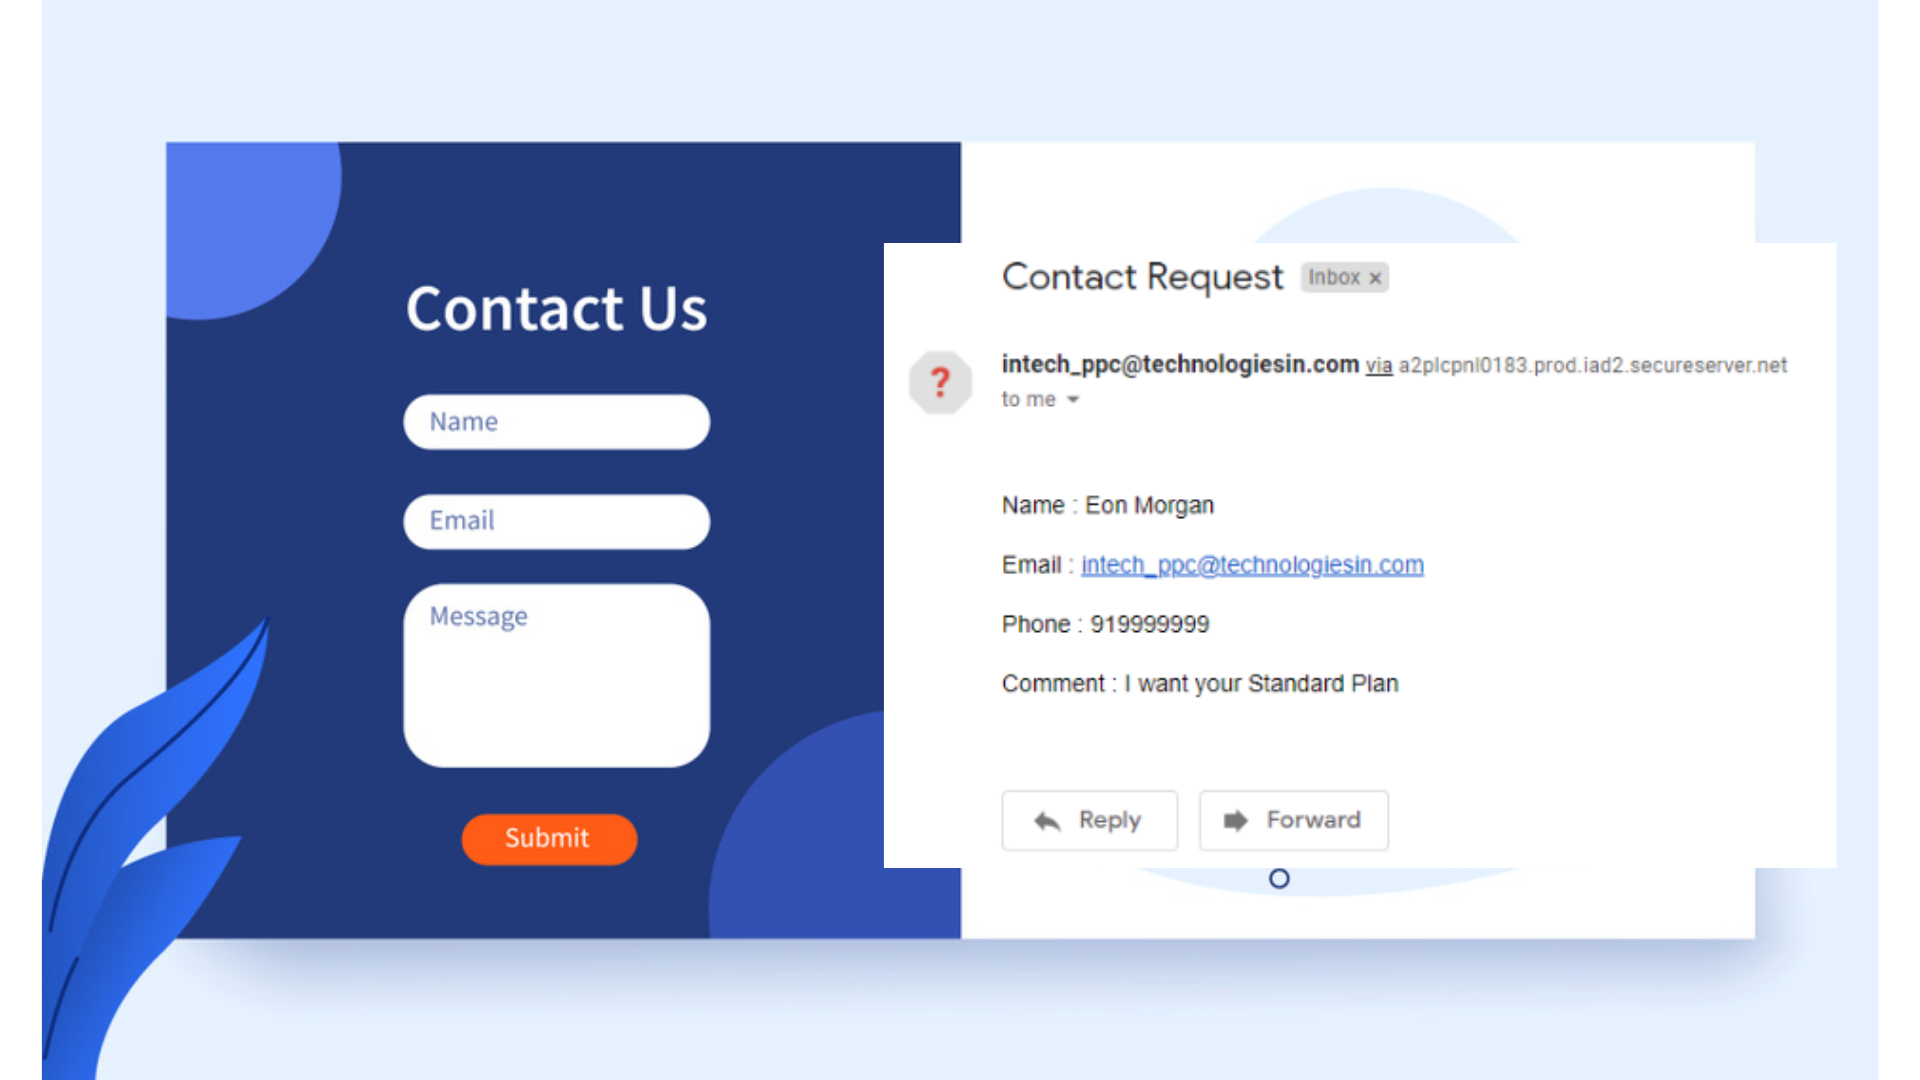
“As we have discussed already that the Chatbot or Chatbox is like a messaging box, which we can able to place inside the website and where in the real-time, the user, as well as the creator, can able to communicate with each other.
Placing or integrating any chatbot or chatbox like- Facebook, WhatsApp, Tawk, etc., just you need to have any website. If you are having a website then it’s very good but if you too are planning to launch your own website, must check these respective popular, powerful hosting provider links- Hostinger, Bluehost, HostGator, WPX, WP Engine, HostWinds, etc. And through these links, you can avail up to a 40% discount.
In our previous post, we have also discussed every step too by which you can able to place your WhatsApp chatbot inside the custom-designed as well as the WordPress-designed websites. You can able to find this post here- WhatsApp chatbot integration inside custom-designed or WordPress websites. Also, we discussed the ways by which you can able to place the Messenger chatbot inside the custom-designed as well as the WordPress-designed websites, you can find it inside this post- Messenger chatbot integration inside custom-designed or WordPress websites.
And today in this post, we are going to explain step-by-step the procedure by which you can able to place the Tawk script or chatbot inside any custom-coded website (HTML, CSS & JavaScript, etc.) as well as on any WordPress website, and yes, of course, it is totally been the free service. Also, the Tawk script or chatbot is been the popular platform, which not only monitors your client or user but also here you can able to check various other useful things like- you can able to monitor your client activity, from where inside your website the user is messaging you, and also you can able to hire chat agents here. So let’s start:-“
1. Inside your Browser search bar search for the website- tawk.to
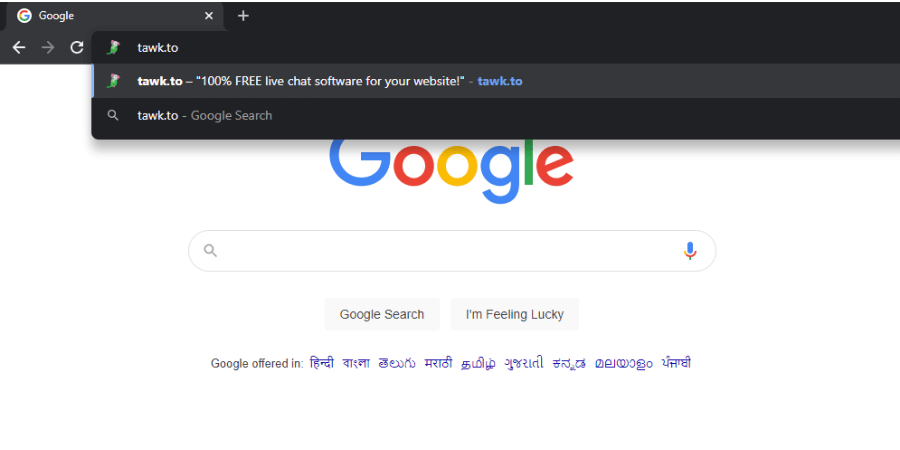
So the very first step you need to follow is to search for the tawk.to, website inside your browser search bar. As tawk.to website or platform is an official chat-based software provider. Put the URL inside the search bar and hit the enter button.
2. You need to create an account here just by signing-up
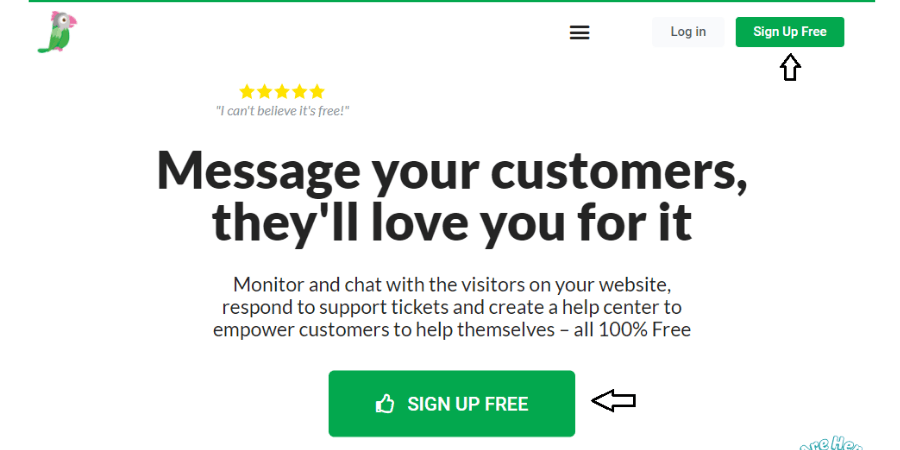
After accessing the official website of tawk.to, now you need to create an account inside here so that you can get the source code, which you further than need to embed inside your webpages.
3. Complete Your Sign-up process here
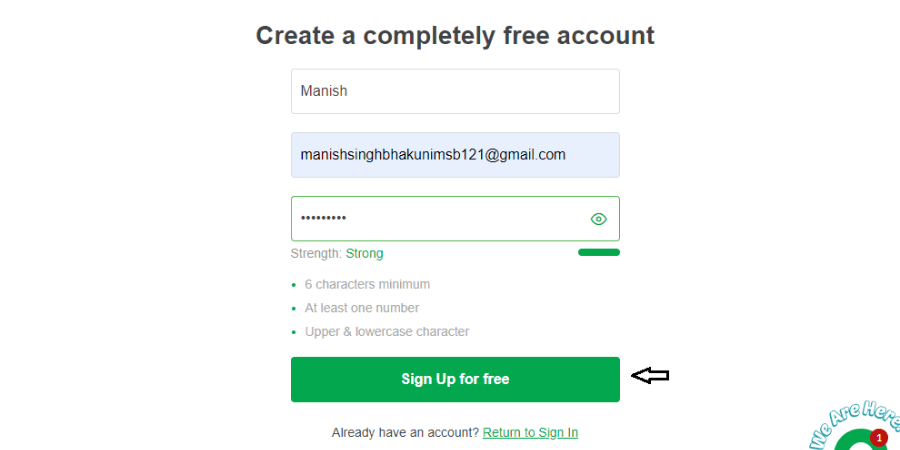
You need to fill in the nominal or basic details to create an account here. It will be asking you the details like- username, email, and password. After filling in your details, kindly click on the Sign Up for Free button.
4. Set up your account now in just 4 steps
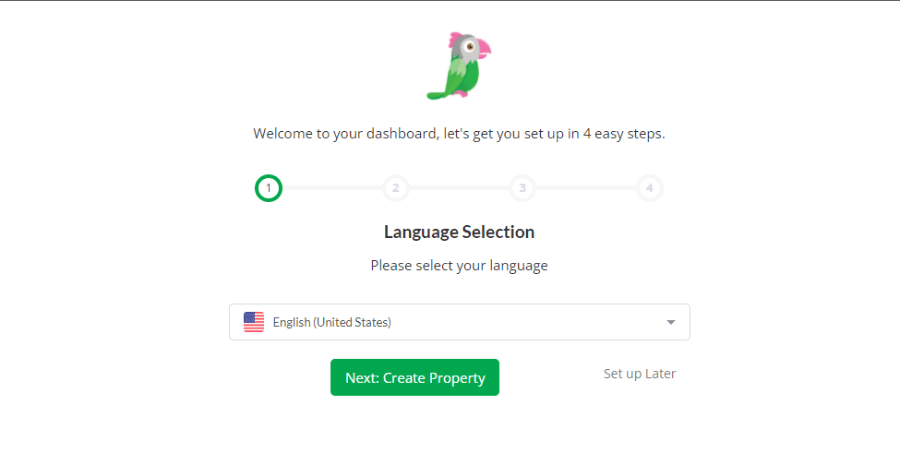
After creating a successful account, now it asks you to set up your tawk account dashboard. So very first, it going to ask about your desired language. After selecting it then just click on the Create Property button.
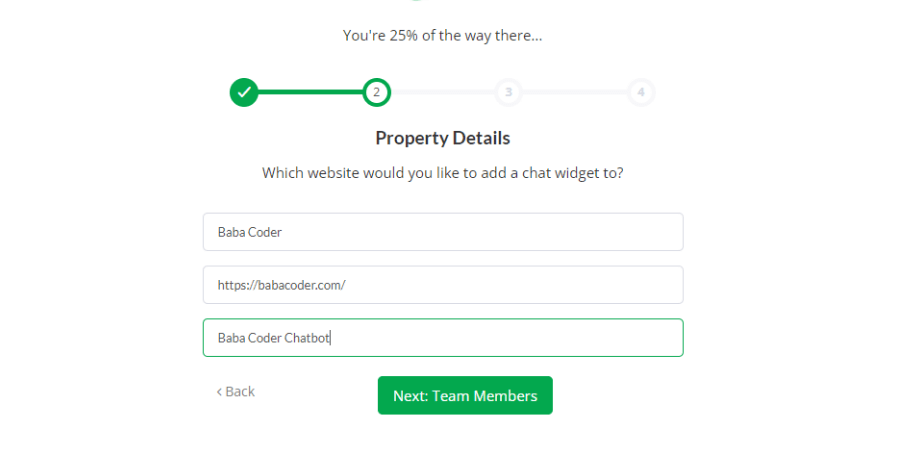
Here is going to ask you about your property details like- the website URL where you want to embed the chatbot and what name you want to provide your chatbot. Then click on the Team Members button to move further.
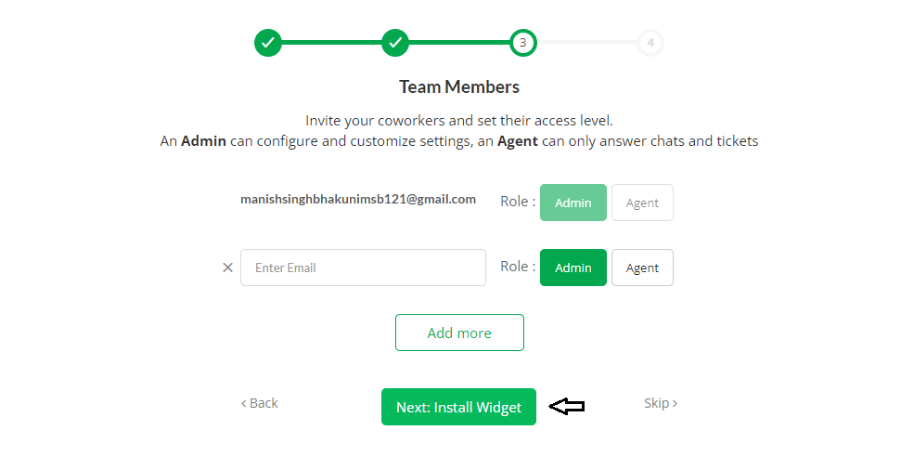
You can here able to join other Team Members as well. You can simply provide their registered mail ids and then provide them with their job role. Then click on the Install Widget button to get the source code.
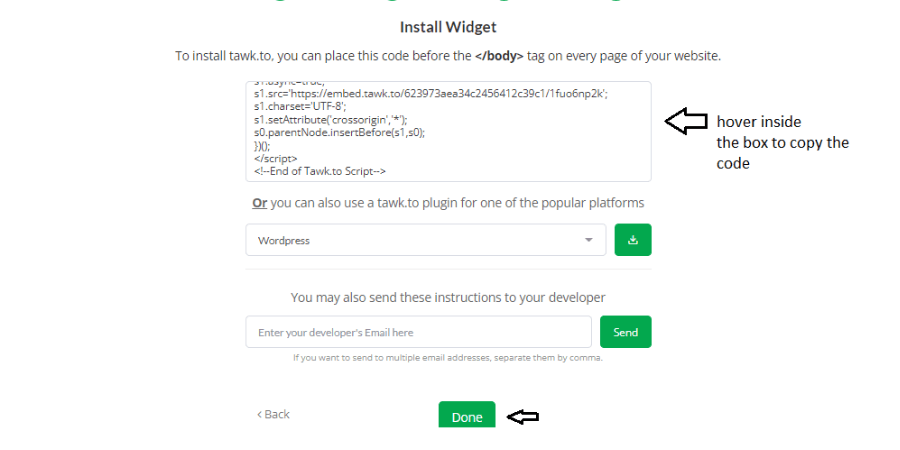
Now, the source code, which it is providing to you now, just copy it, as it is the only main source code, which you going to paste inside your desired webpage or website.
Integrating Tawk Chatbot Through Custom Code
Now let’s understand the steps that, how you are going to place the Tawk chatbot or chatbox inside your custom-coded website. And the procedure is as follows:-
1. Place your Tawk chatbot source code inside your desired webpage
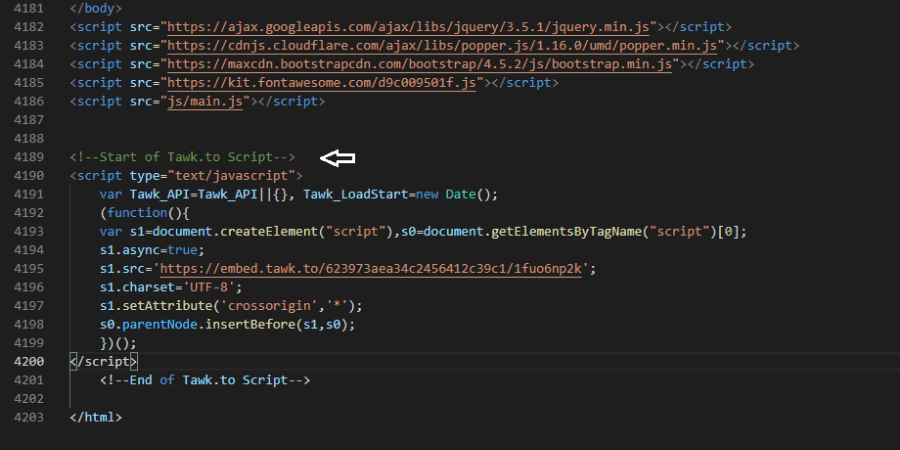
Now, inside your desired webpage, you need to place the copied source code inside the (<head>…</head>) tag.
2. Upload your webpage inside the server and refresh the webpage link or website
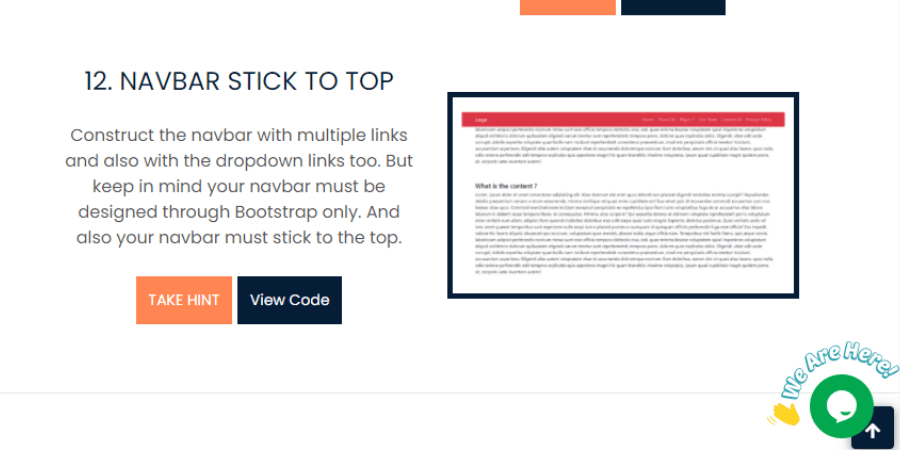
If you are doing it on your Local computer now then you must need to update the file inside the live server too. And then refresh your particular webpage or website or URL. If you want to know how to live your custom-coded website and where the files need to upload inside the Live server, then visit this post- https://babacoder.com/blog/how-to-live-your-custom-coded-and-wordpress-website/.
If your all procedure goes well, then after refreshing your particular webpage you are able to get the fully-functioning Tawk chatbot or chatbox button.
Integrating Tawk Chatbot In WordPress
Now we discuss here the procedure need to follow if we want to have the Tawk chatbot inside our WordPress-designed website or webpage. So the procedure is as follows:-
1. Access your WordPress dashboard the very first
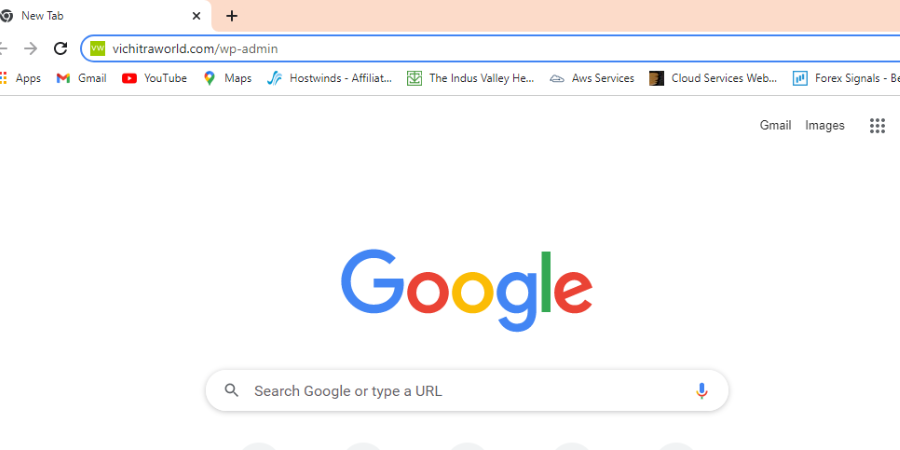
Very first you need to access your WordPress dashboard, which you can able to do by pasting your website URL followed by /wp-admin, the same as shown in the image too.
2. Fill up your WordPress login details
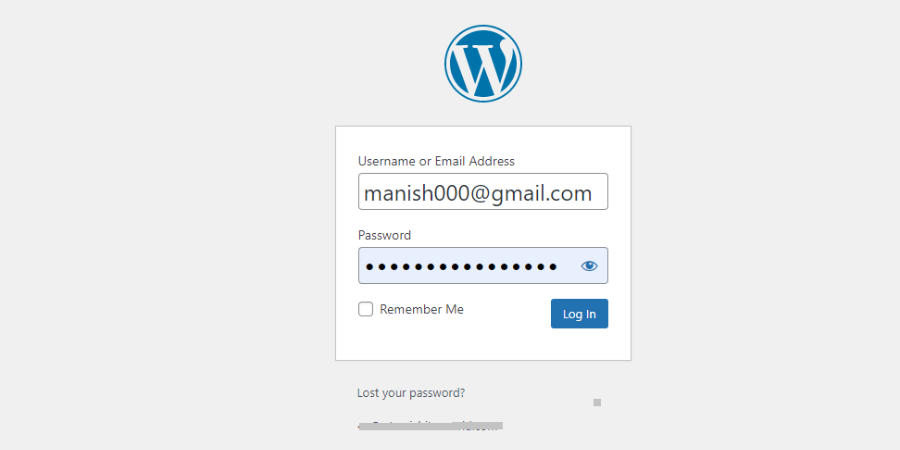
To access your WordPress dashboard, fill in your WordPress login details first like- WordPress associated username or email and password. If anyhow you forgot everything like your WordPress-associated username, email address, and password, then you can take the help of our this post- How to edit WordPress user email and password from the Live Server Database.
3. After accessing your WordPress dashboard go to the Appearance component or tool
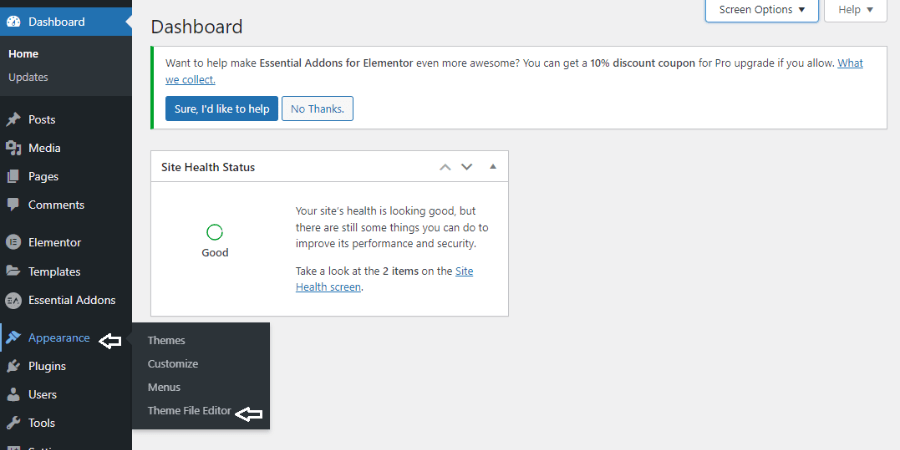
As soon as you are inside your WordPress dashboard, then you need to click on the Appearance tool or setting as we want the files regarding our site, where we going to place the Tawk chatbot or script code. So go inside the Appearance > Theme File Editor.
4. Search for the Theme Header file and paste your Tawk chatbot or script code
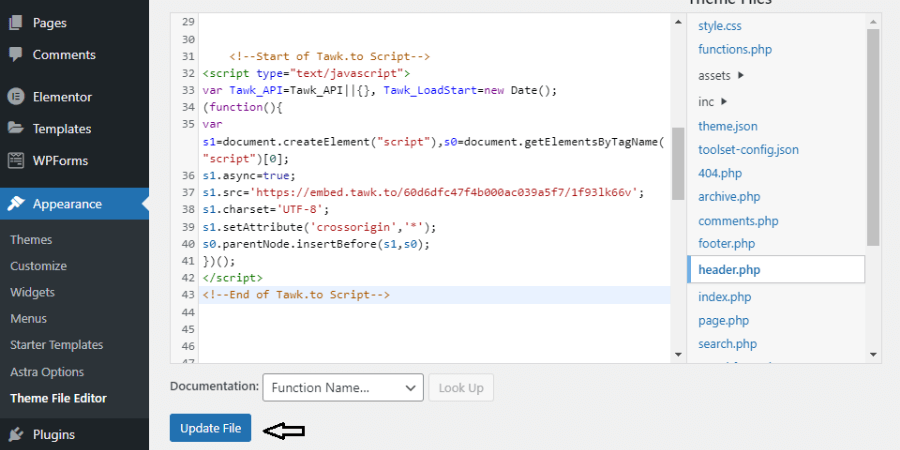
Inside the Theme File Editor, you can able to access your website theme files, where you can able to access your header files, footer files, sidebar files, etc. But for now, you need to search for the Theme Header file, naming (header.php). Click on it then.
Now you are going to get your website header file then, where you need to place your Tawk chatbot source code or Widget code, which you also have copied from tawk.to, website. Then click on the Update File button.
5. Refresh your particular webpage link or website

After updating everything, then just refresh your particular website or webpage link. And if all goes well, then you are able to get the fully-functioning Tawk chatbox button inside your website.
Messages Inside Chatbot
Here I am enlisting the procedure below, that how you going to monitor or handle your client or user, messaging inside the Tawk chatbot. So let’s start:-
1. If any customer messages you inside the Tawk chatbot
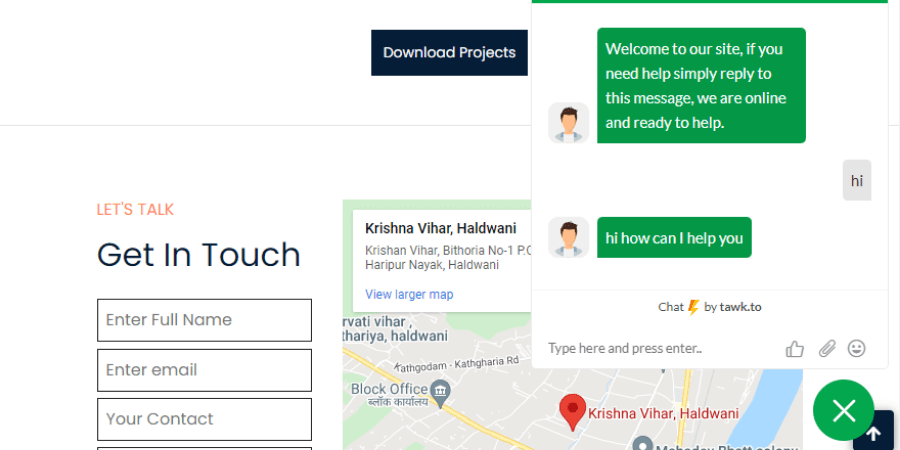
Whenever any user uses to message you from the Tawk chatbox, which you have placed inside your website, automatically you are going to get the notification inside your Tawk website.
2. Access your Tawk personal dashboard
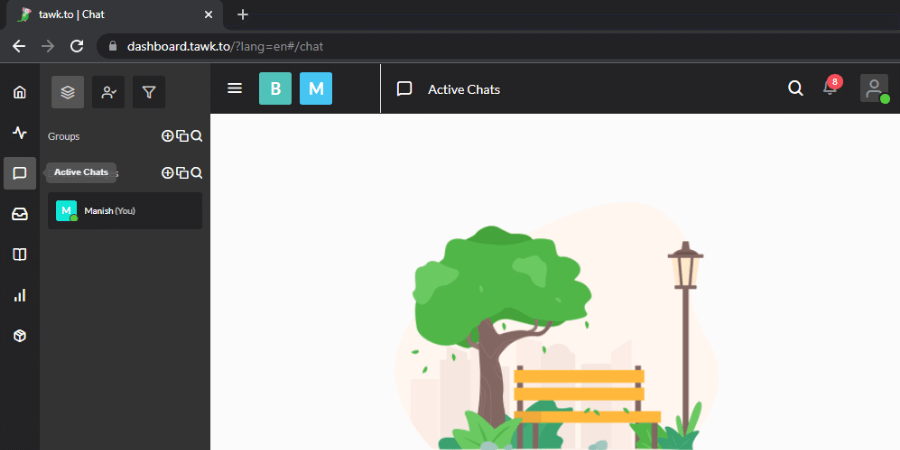
You need to access your account or dashboard inside the tawk.to website just by signing inside it. Then after accessing the dashboard, on the left sidebar, you are going to get the message box (Active chats), and there only you need to click off.
3. Message your user as per your choice
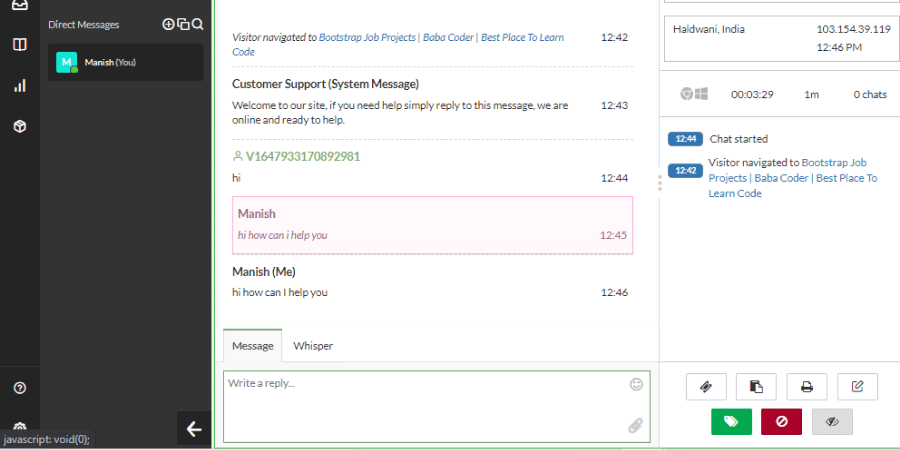
Now inside the Active chat option, you will be getting the active chat list. Just click on them and then you are ready to send or accept the messages here. Also, on the right side of the page the user address details, messaging timings, and much other information you can able to find too.
Conclusion-
As tawk.to, website is the most popular chat-based application or software, where monitoring the clients is very easy and reliable. Plus we can also able to track our Visitors, Page Views, Chat & other reporting data to like- visitor engagement, etc.
So here in this post, I have explained every step by which you can able to place the Tawk script button inside your custom-coded website as well as in WordPress. If then also you are facing any issues then feel free to comment down below, I will surely help you.
If you want to know the procedure of how you can embed the WhatsApp script inside the website then must visit this post- WhatsApp chatbot integration inside custom-designed or WordPress websites, and for embedding the Messenger script inside the website, then must visit this post- Messenger chatbot integration inside custom-designed or WordPress websites. Stay tuned for more such information.


