“WooCommerce, a powerful plugin that is designed for small to large-sized online merchants, that makes the creating and managing online store simple. It generally eases down the process of managing an online store, and that is the reason, it is more popular in the market today.“
As we have already talked much about WooCommerce in our earlier post- WooCommerce settings for any e-Commerce store in WordPress, and there we briefly understand the basic and important settings of WooCommerce. Also, we understand there while installing the WooCommerce plugin, automatically we get the Product settings of WooCommerce too, which is responsible for managing, creating, deleting, and other settings for different categorized products.
And today in this post, we will be understanding the different components of WooCommerce Product settings. Also, we will be understanding the steps by which we can add any new product.
So the very first step, you need to access your WordPress dashboard and then you need to quickly add the WooCommerce plugin. If, you are facing any issues in installing the WooCommerce plugin, then do check our WooCommerce settings for any e-Commerce store in WordPress post:-
WooCommerce Product Components
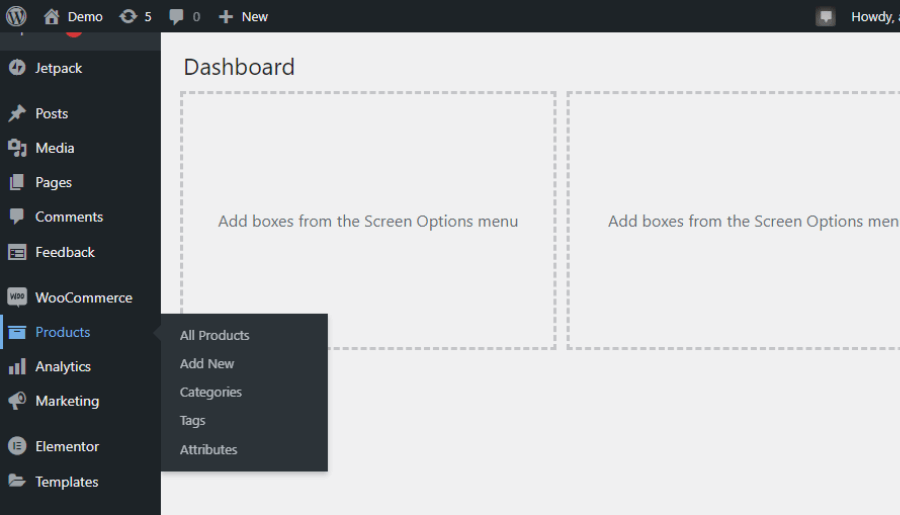
WooCommerce Products have different components and these components are enough to list your own customized products. Before knowing the steps of how to add a new product, let’s understand the components one by one. And these are as follows:-
(i) All Products- You can able to manage your all-product list here. In the table form, you will be getting your product list. Also, you can easily able to edit, delete and manage the current product.
(ii) Add New- From here you can able to add a new product. You can able to customize your product name, description, inventory setting, shipping settings, etc.
(iii) Categories- You can able to categorize your product list here. For example:- Your different inventory products may fall inside the different similar categories, like- you are selling pickles and murabba, so you have 2 categories your Mango pickle and the Lemon pickle will fall inside the same Pickle category, whereas your Mango murabba and the Lemon murabba will fall inside the Murabba category.
(iv) Tags- Tags are simply keywords that you can add to your respective product to help users or viewers find your content or product.
(v) Attributes- Attributes are nothing but a specification that defines the property of your product.
So, above we have mentioned the basic summary of every component working. Now let’s understand- how to add or list a new product.
1. Add New Product from the WooCommerce Products
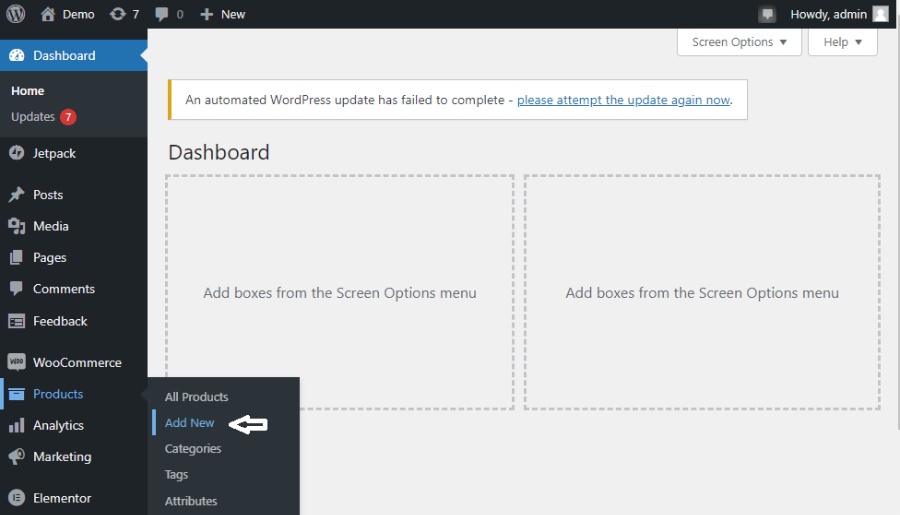
Simply, we need to click on the Products section of WooCommerce, as shown in the image too. And automatically we get a dropdown list of different components of the product. To add a new product, click on the Add New option and then we can able to add a new product.
2. Feed the product title and description
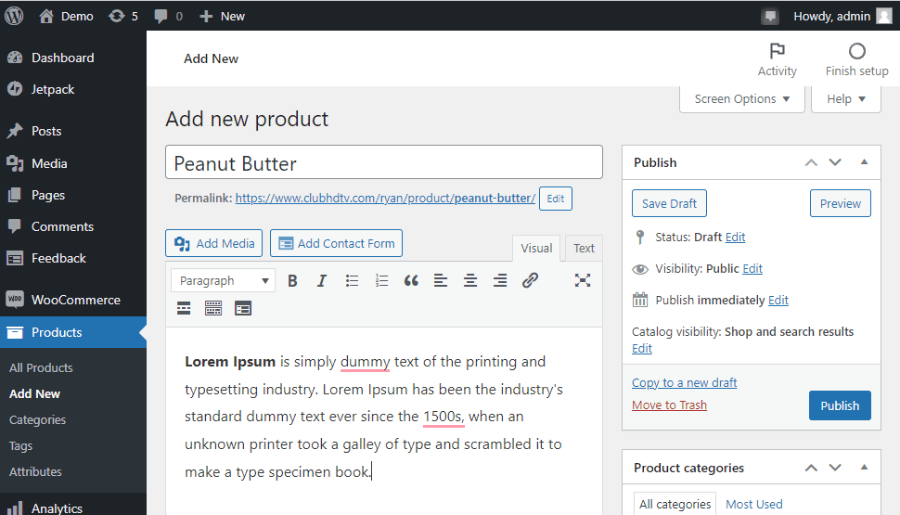
As it is a fact that your different products have different titles and descriptions. So you need to include the particular title and description of your product here. Briefly, mention your product title and description here.
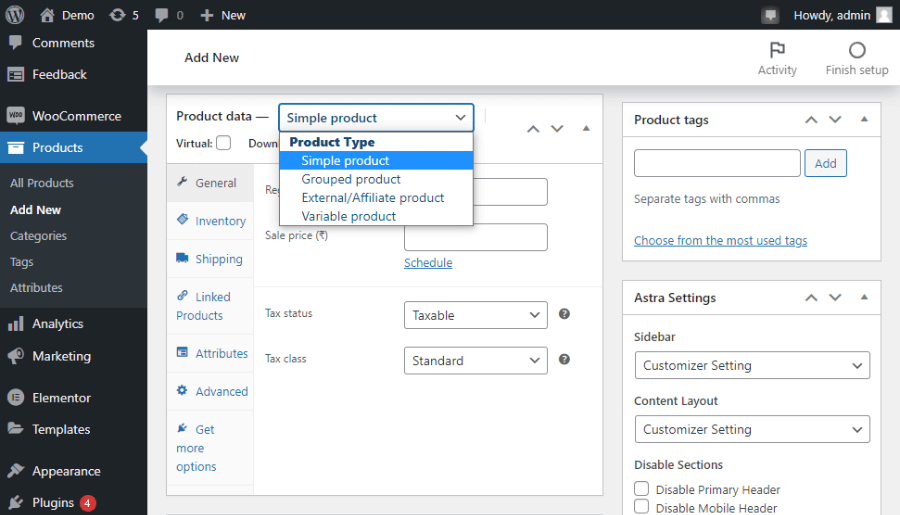
Now, scroll down a little bit, and you will be able to define the Product data type here in the following categories:-
- Simple Product– most basic and widely used product is listed under this category.
- Grouped Product– here you can able to add additional products to your particular product, so that if any customer searched for this product, then he can also able to get different similar products.
- External / Affiliate Product– you can also able to list any external or affiliate product.
- Variable Product– it offers a set of variations on a product, with control over prices, stock, image, and more for each variation.
If you have Virtual or downloadable products then you can categorize them as well, where:-
- Virtual Product– the products which are intangible and are not able to ship.
- Downloadable Product– that products give access to a file upon purchase.
3. Fill WooCommerce Products General Settings
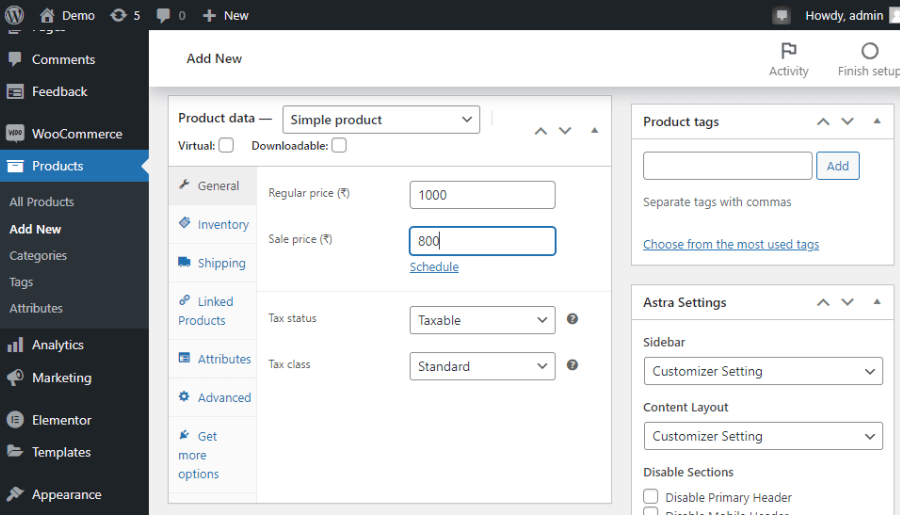
We all are humans and we all have an in-built bargaining nature, and here as a seller, you will showcase your particular product’s regular price and the sale price. From the General settings, you can easily able to customize it.
- Regular Price– is your that price which seller use to showcase the false or increased price value.
- Sale Price– is the actual or final pricing amount in which a seller wants to sell out the product.
- Tax Status– here you can define whether or not the entire product is taxable, or just the cost of shipping.
- Tax Class– here you can define your different tax classes.
4. Fill WooCommerce Products Inventory Settings
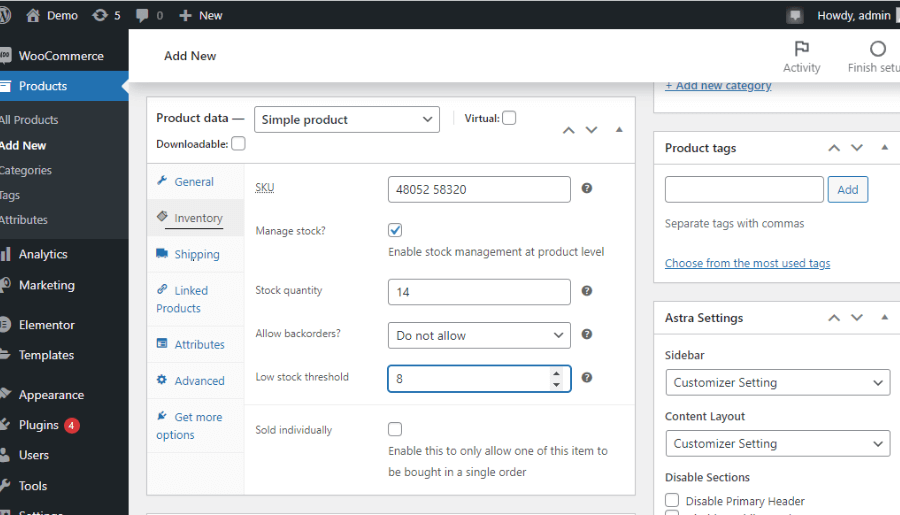
Inventory details you can customize here easily. Here you can define the product SKU unit, product stock quantity, low stock threshold, etc.
- SKU– it is usually an 8 alphanumeric digit set, that retailers assign to any particular product to keep the track of stock levels internally. And if the product has different colors and sizes, then each variation of the product must need to have a unique SKU number.
- Stock quantity– total number of goods or raw materials kept with you on the premises of a shop or business.
- Allow backorders– here you can define whether particular product backorder is possible or not, simply means whether any buyer can able to return back the order.
- Low stock threshold– is a quantity that you can set to help in managing the inventory. Here when your particular product quantity comes to low, then you will be get notified through email.
5. Fill WooCommerce Products Shipping Settings
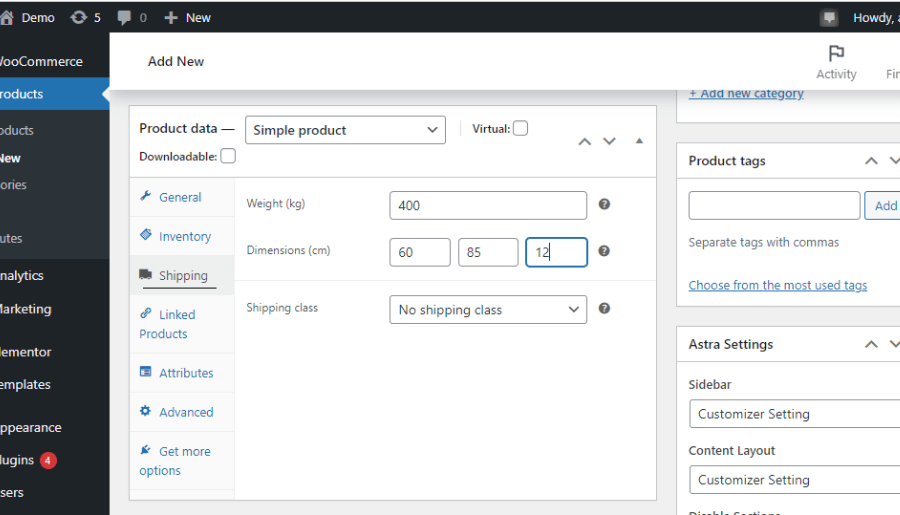
Now we need to feed up the product shipping details.
- Weight– product total weightage in kilograms.
- Dimensions (cm)– you need to define the product width, breadth, and height.
6. Fill WooCommerce Products Linked Product Settings
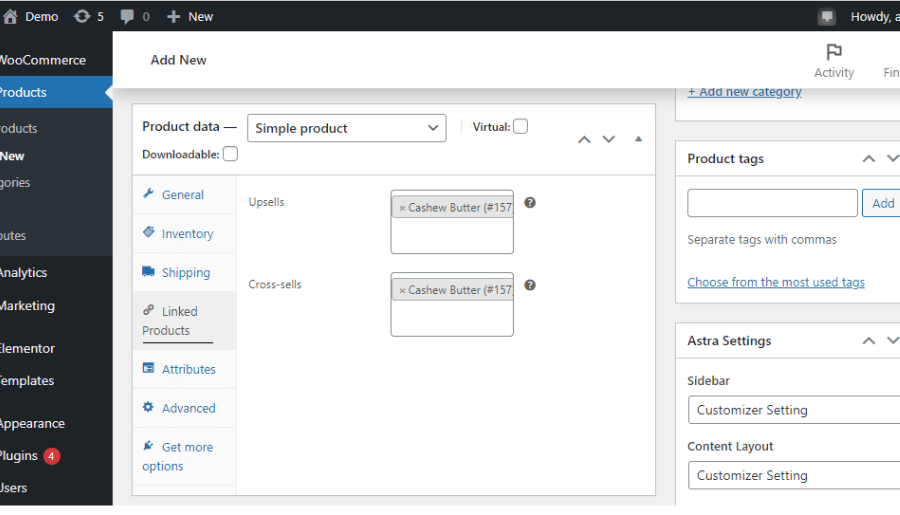
You can showcase different category products too whereas:-
- Upsells– are those products that you can recommend instead of the currently viewed product, which means you can showcase any specified, better quality, or expensive product.
- Cross-sells- are those products that you use to promote your in the cart, based on the current product.
7. Fill WooCommerce Products Attributes Settings
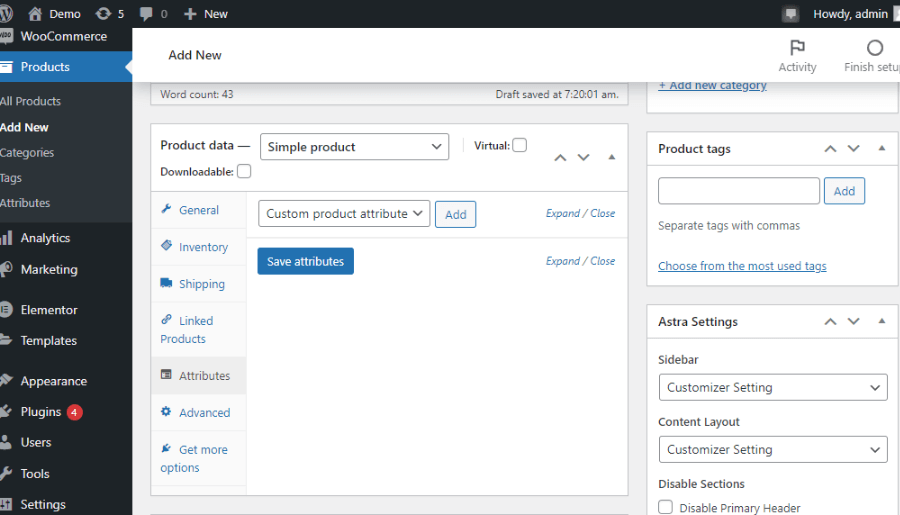
More you can define your product here by specifying the attributes. This means you can define different characteristics of your item or product.
8. Fill WooCommerce Products Advanced Settings
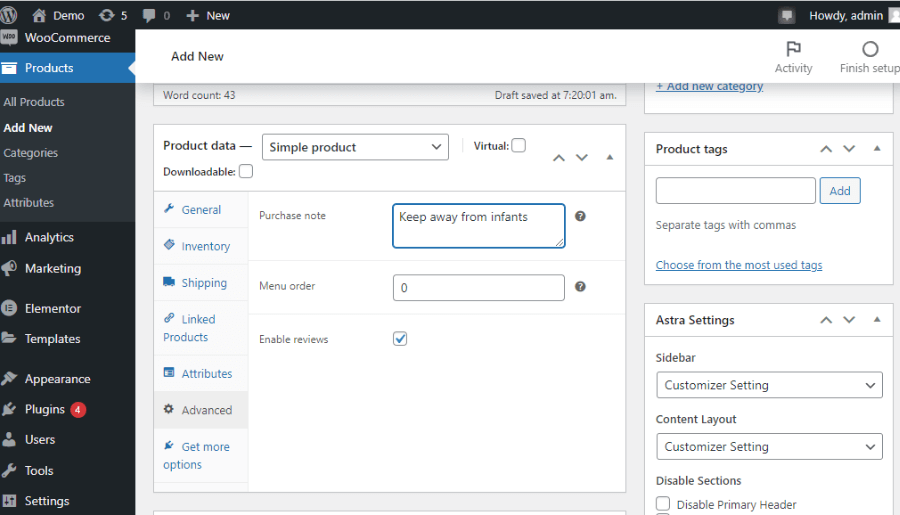
Product more advanced settings you can customize here like providing any purchase note with your product or menu order etc. where,
- Purchase note– any optional note, if you want to share with your customer.
- Menu order– is your custom ordering position.
Also, you can opt or avoid the customer reviews about your product. If you want the reviews to check on the checkbox then.
9. WooCommerce Products Extensions
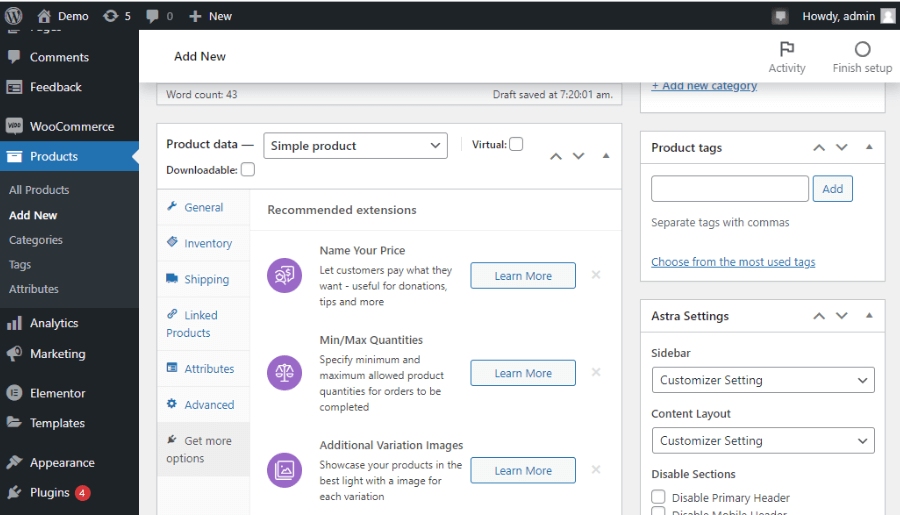
You can able to integrate different extensions here which can help you in more ways, or also you can skip these extensions. It’s up to you, there you can get free as well as paid extensions.
10. Mention your particular Product categories
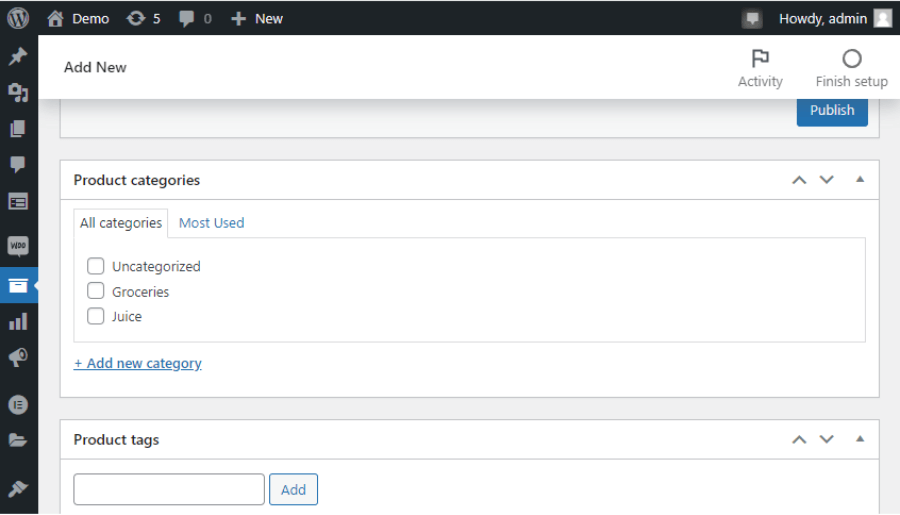
Your particular product falls in which category, here in the right panel, you can decide or define it. For example:- You are a seller of Pickle and Murabba. Now your Lemon Pickle and Mango Pickle will fall in the Pickle category and your Lemon Murabba and Mango Murabba will fall in the Murabba category.
11. Mention your particular Product tags
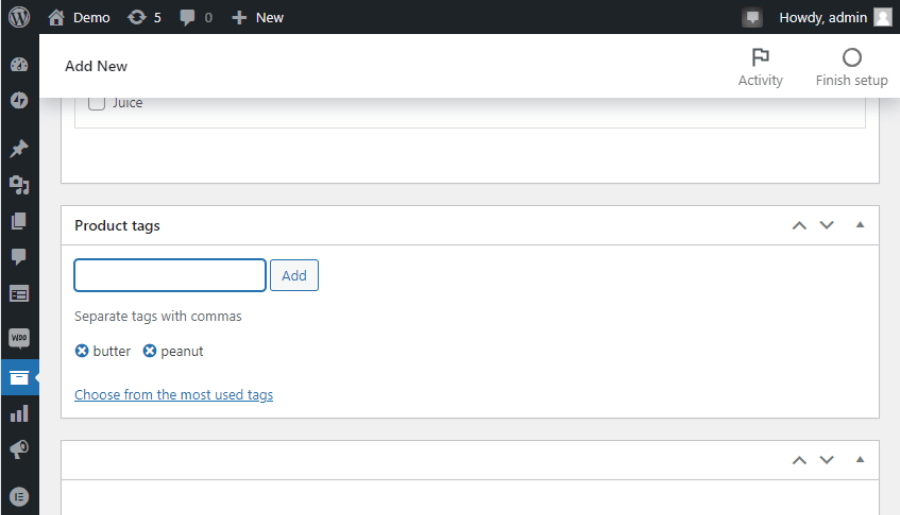
Tags are the special or descriptive keywords, which help users to find your product or content. At least include 5-6 tags.
12. Customize the Astra Settings
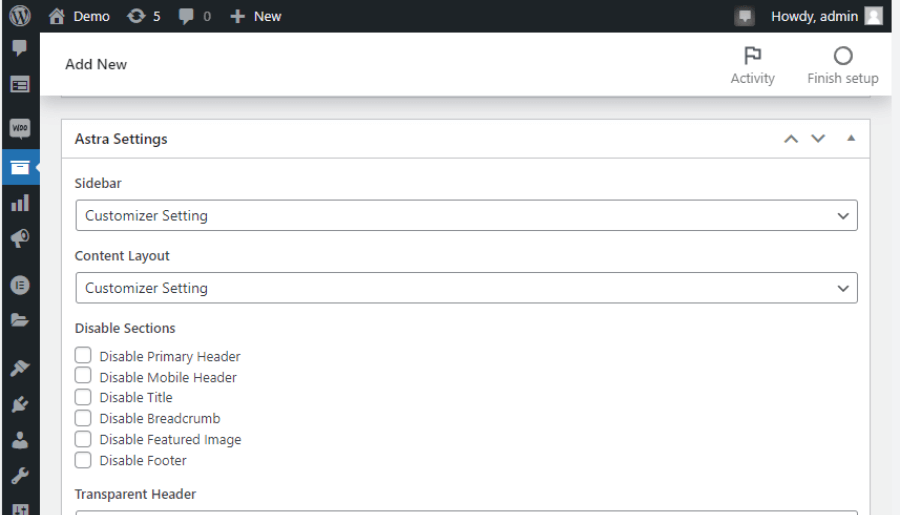
If you are following us from our previous post, then you must know about the ‘Astra‘ which is been a free theme of WordPress and here, you can customize more your ‘Astra‘ theme.
If also you have installed a different theme then you can able to customize your particular theme settings with respect to your product.
13. Place the particular Product image and gallery
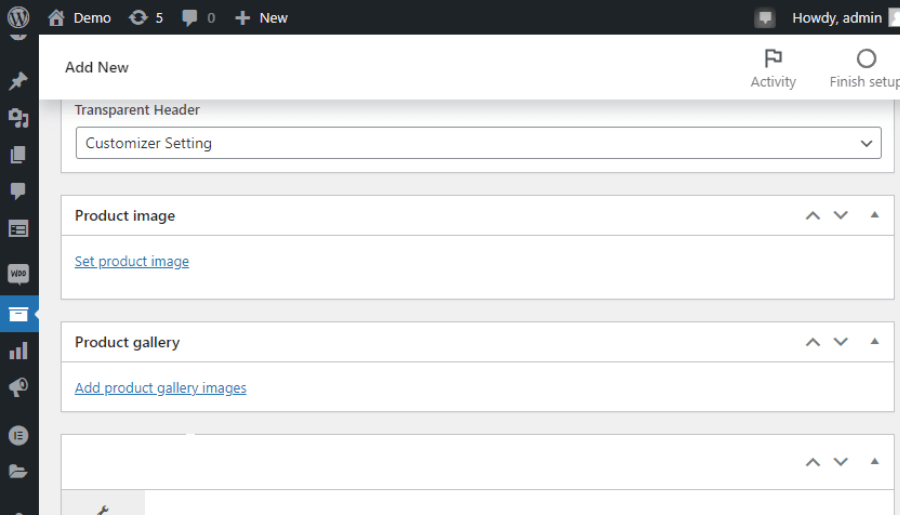
Here you can place your particular product image or a gallery image, which generally increases the interest among the users or customers. Your product image should be neat, attractive, and good in quality.
After successfully placing the images and defining every required setting, then simply click on the Publish button.
Conclusion-
So, we have understood our WooCommerce Plugin and its every component. In our previous post, we understood the WooCommerce Setup configuration in our – WooCommerce settings for any e-Commerce store in WordPress. And here we have understood in brief the WooCommerce Products settings.
If you have any queries regarding the WooCommerce Plugin or others, then feel free to comment below, I will surely help you out.


