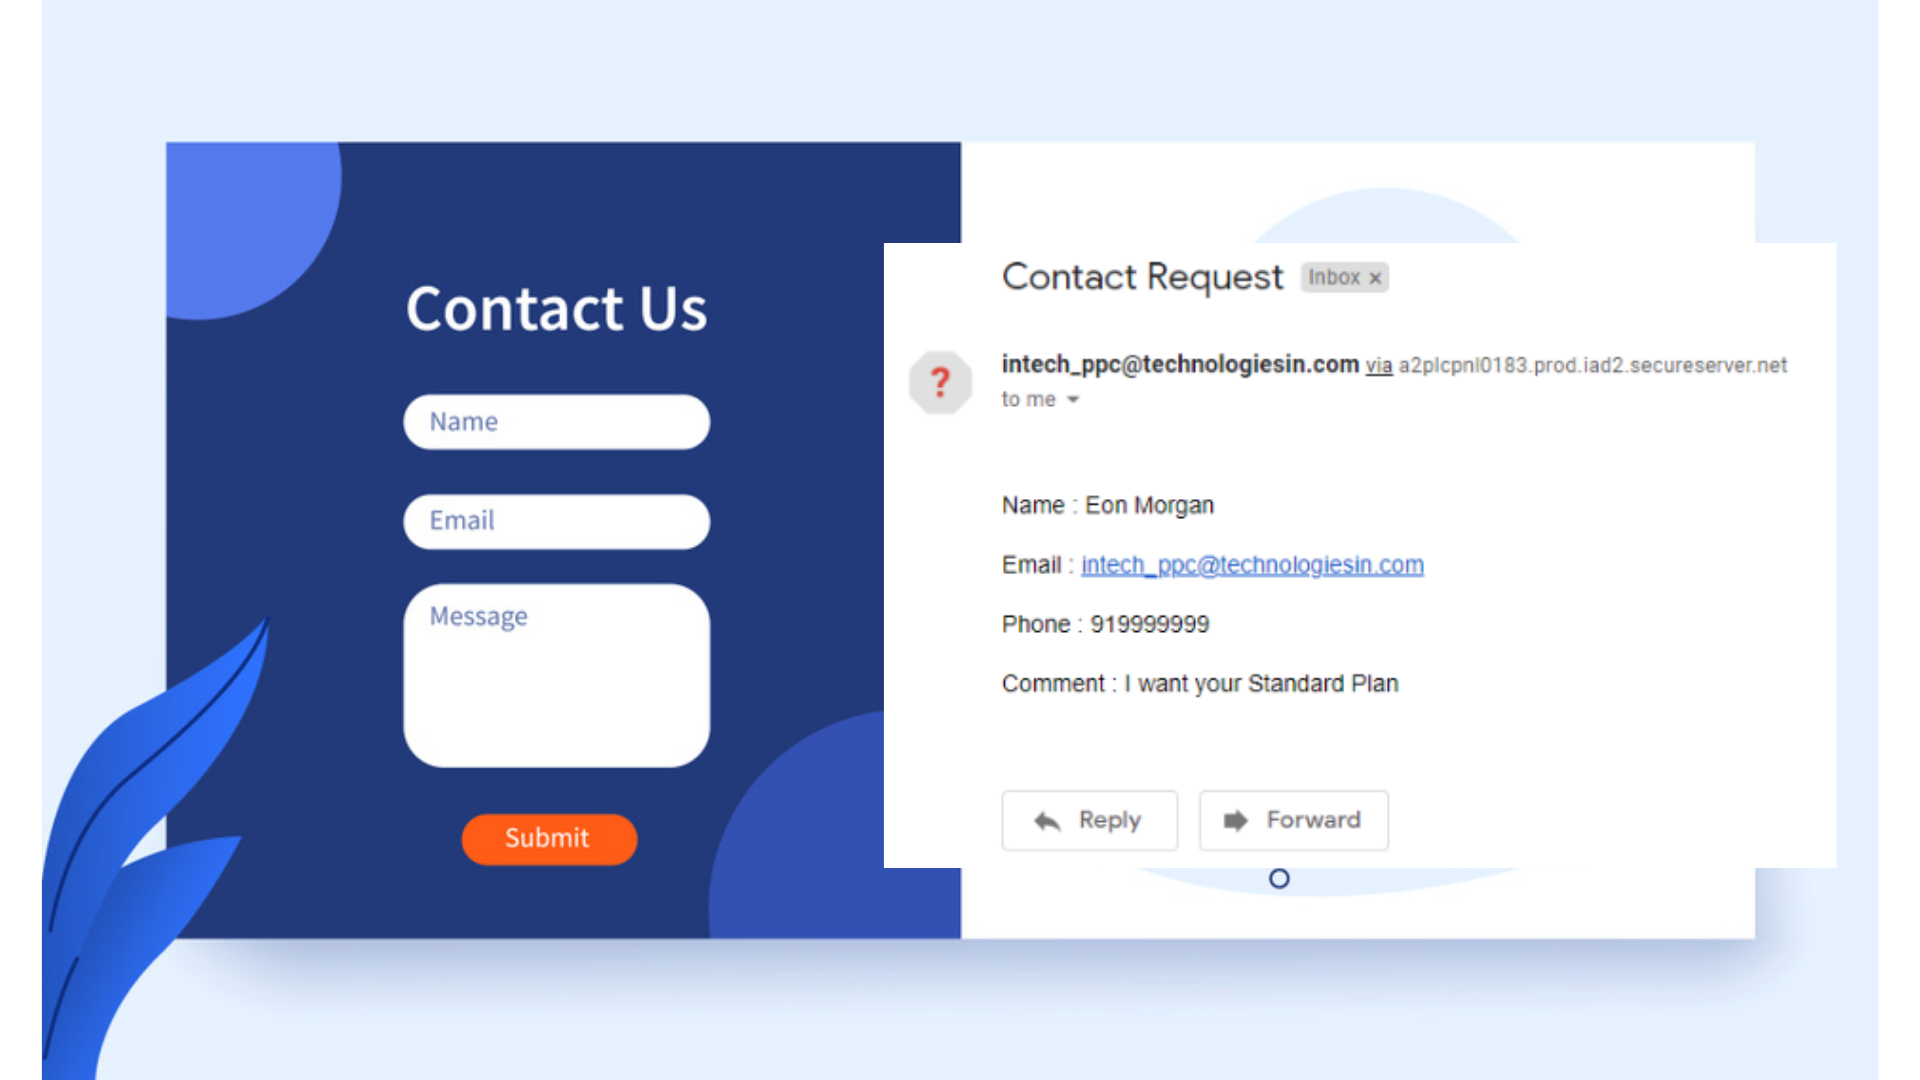
“Contact forms inside any website play a vital role, where the creator or reader can directly communicate with each other. Readers, if having any sort of query or anything can directly ask the creator, by filling up the form and, automatically all the details with queries or messages, will drop inside the creator’s particular mail. But to gain this type of functionality some piece of code or changes we need to apply inside our website, and today in this post, we are learning the same method by which we can design, validate and activate our contact form inside the WordPress designed website.
If you are running any custom coded website (designed using HTML, CSS, Bootstrap & JavaScript, etc.) then you can take help of our following posts:-
- 100% Working Contact Form Through Custom Code (Part-1)– here you get the beautiful, validated, and activated form which when filled-up automatically all the user details, will drop inside the tabular format inside the mail.
- 100% Working Contact Form Through Custom Code (Part-2)– here you get the beautiful, validated, and activated form which when filled-up automatically all the user details, will drop inside the paragraphing format inside the mail.
- 100% Working Contact Form With Multiple Input Tags Through Custom Code (Part-3)–here you get the beautiful, validated, and activated form with multiple input tags, which when filled-up automatically all the user details, will drop inside the mail.
If you have any issues in installing WordPress inside the server, then you can visit our How to install WordPress inside the hosting server post, where you can successfully install WordPress in the cost-efficient hosting plan. You can purchase any hosting plan, and know the Pros and cons of different hosting providing companies, then must visit our- Pros & Cons Of Different Web-Hosting Companies.
But for now, if you want to learn WordPress and want it to run on your local server or computer, then must visit our- How to Install WordPress In Your Local Server post.
To gain this mailing functionality where the user details you will get inside your mail, we will be using a free and very powerful plugin, named- WPForms.
This WPForms plugin is one of the trusted and most popular plugins in WordPress. Here customization of the form plus the mailing functionality all are been so easy to propagate. Just, by doing the nominal customization, we can get our fully functioning contact form.” Let’s understand all aspects:-
1. Go to the WordPress dashboard and access the Plugins section
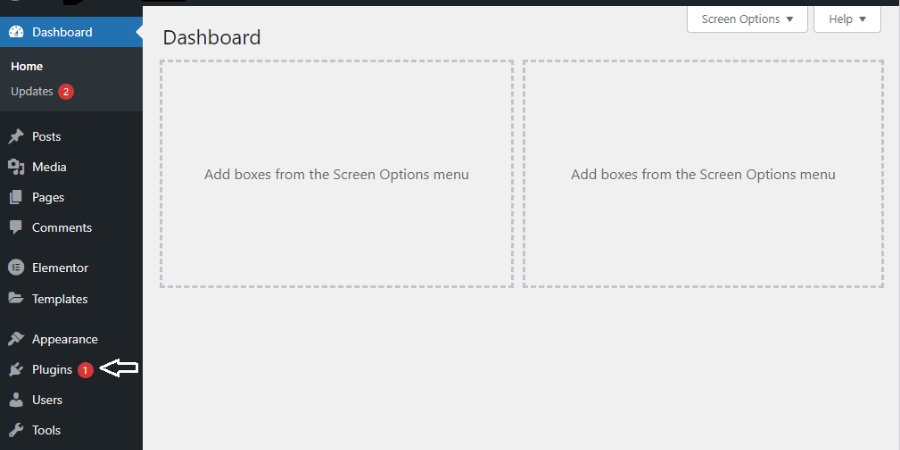
Before everything, we need to add a plugin named “WPForms“. And to add this plugin, go to the main WordPress dashboard and search for the Plugins section, which you can find on the left sidebar, and click over it.
2. Click on the Add New button to successfully install the new plugin inside
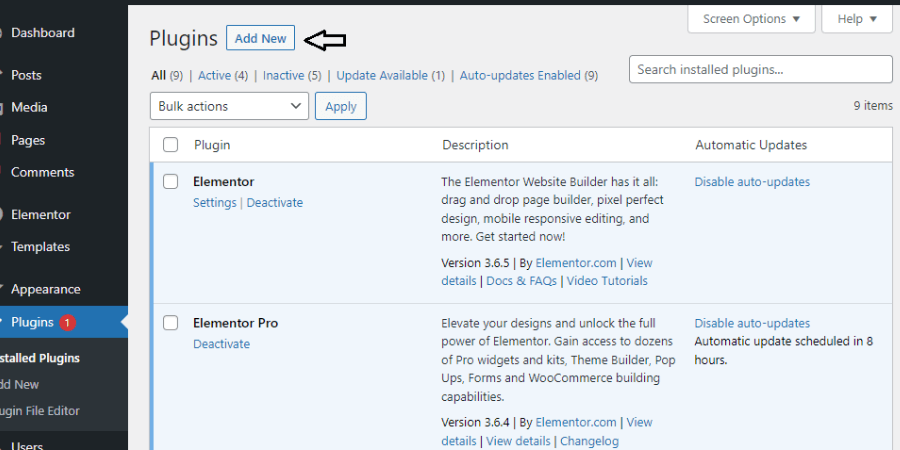
Inside the Plugins dashboard, now you need to click simply on the Add New button to add a new plugin inside the site.
3. Search for the WPForms Plugin and install it
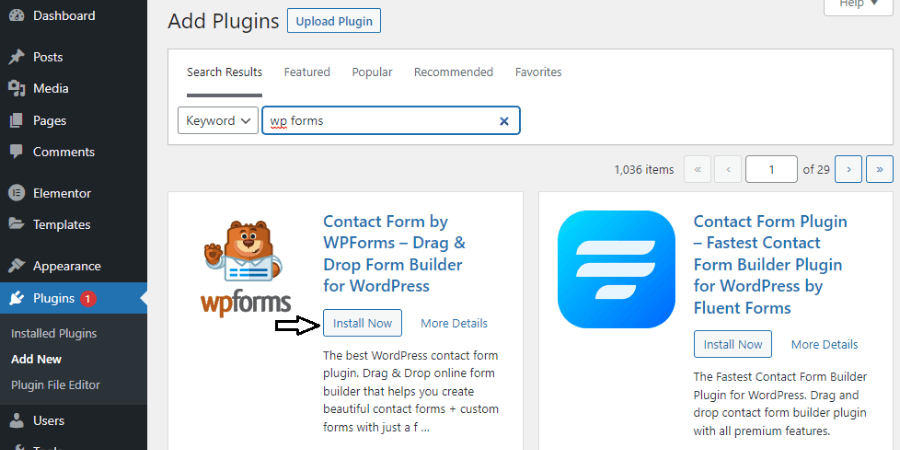
As soon as you click on the Add New button, you will be accessing different plugin search result pages. , inside the search bar, you need to type- ‘WPForms’, as shown in the above image. Then, click on the Install Now button, to install or add this plugin.
4. Now, activate the successfully installed WPForms plugin
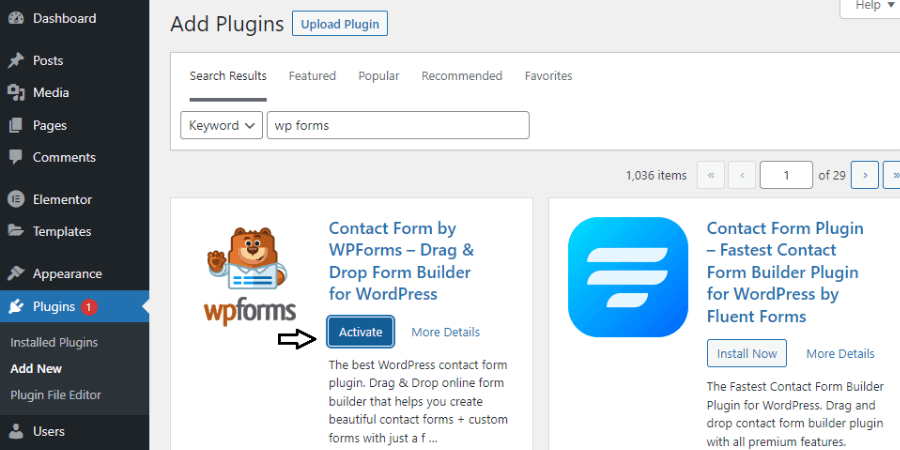
After the successful installation of this plugin, now you need to activate the plugin, so it can play its role. After clicking on the Activate button, you need to return back to your WordPress dashboard now.
5. Access the Contact menu or settings inside the WordPress dashboard
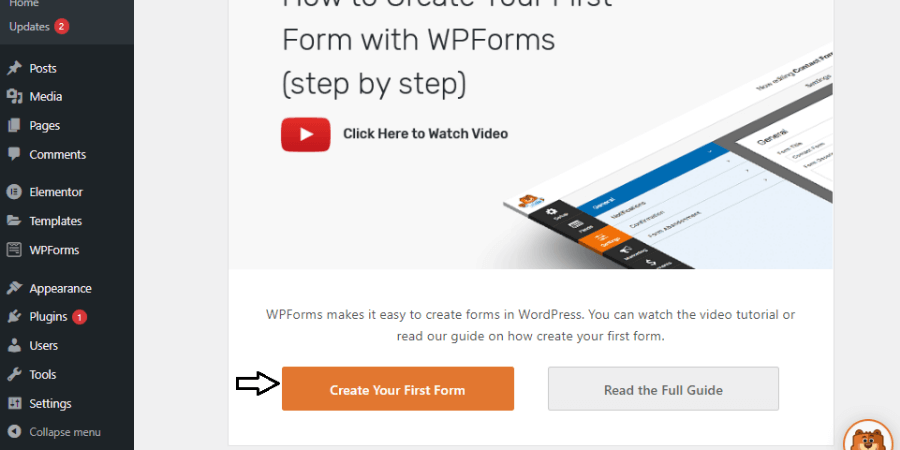
As, soon as your WPForms plugin is installed and activated, automatically you will get a WPForms component included inside your WordPress dashboard, as shown in the image too. You need to click over it, and now you need to create your form or click on the Create Your First Form button.
6. Click on the Add New button to create the new Contact Form
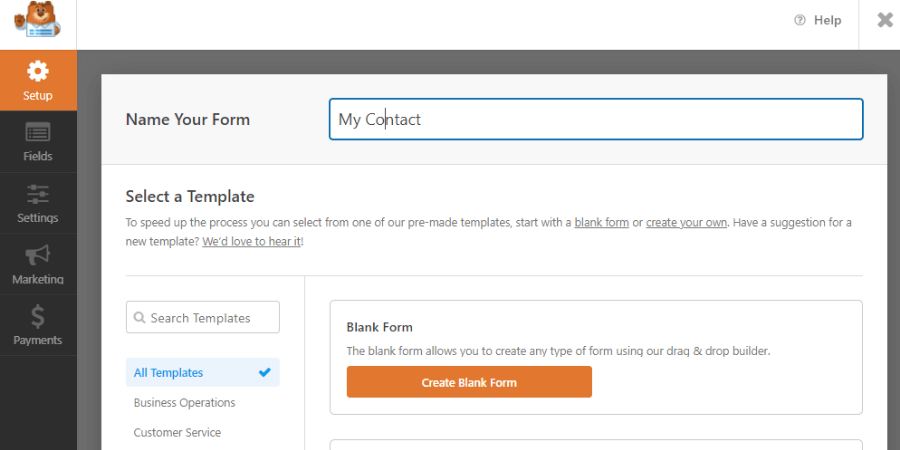
The very first, you need to type down is your Form name, so place any particular form name. As in my case, I am keeping the name- ‘My Contact’.
7. Setup your Form here
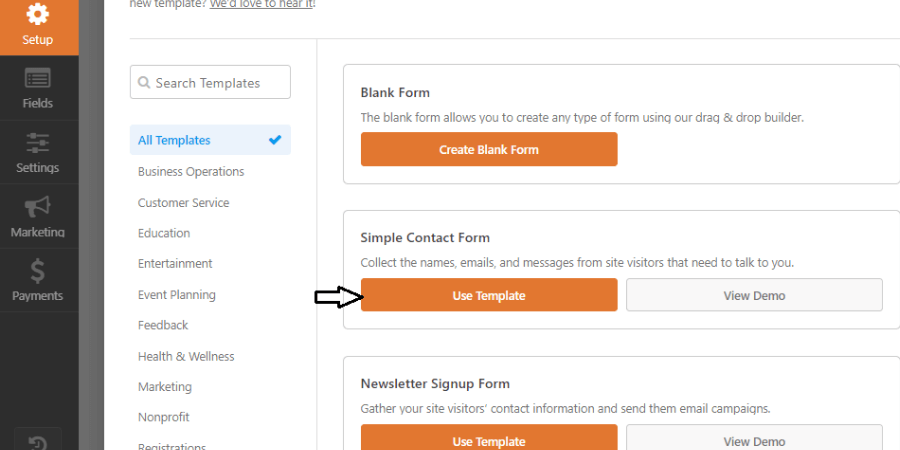
Here, you need to set up your contact form now. You can able to create your form from scratch or, you can use the provided templates by WPForms. For now, I am using the Simple Contact Form template, so I am clicking on the Use Template button, as shown in the image too.
8. Drag & Drop required input fields from the left
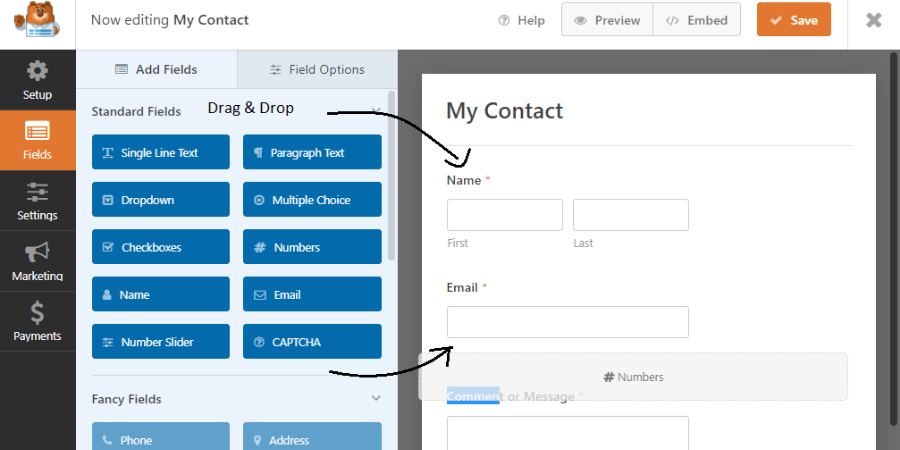
Now after setting up the form, switch to the Fields section from where You can able to drag and drop your form more required fields. And as exactly your form is visible there, same you can able to import inside your website.
9. Now customize the Form notifications settings
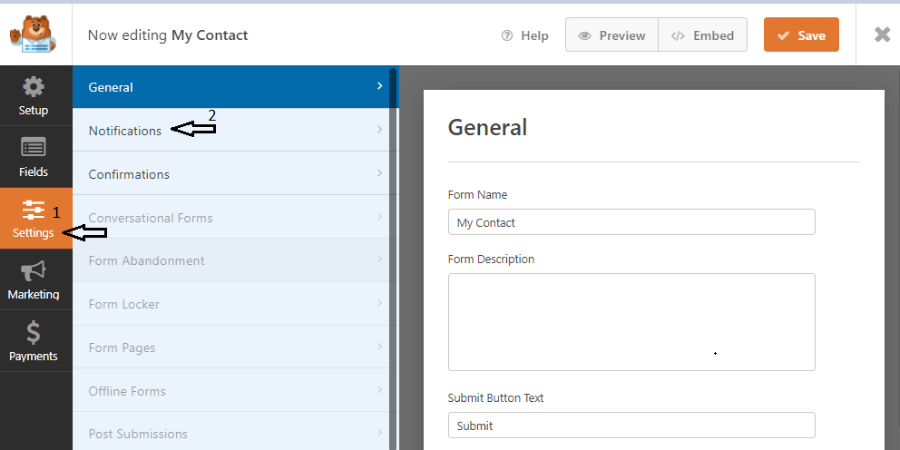
After completing the form design, now you need to play with the Notifications settings. Here you need to add any particular mailing address where your whole user details after the form submission will drop inside.
10. Now customize your Notifications settings
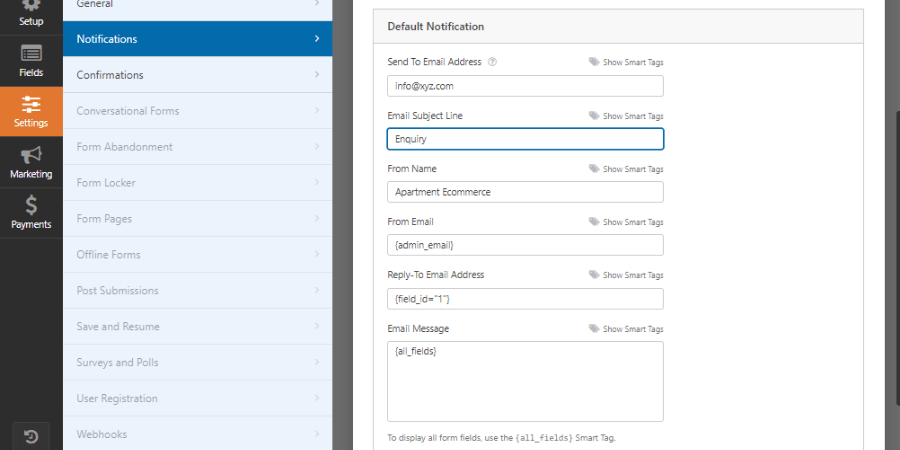
Here, you need to customize your notification settings, where inside:-
- Send To Email Address:- the mail address where the user details will drop. Multiple mail addresses you can include here are separated by commas (,). For Example- xyz@gmail.com, abc@gmail.com.
- Email Subject Line:- here you can decide on your email notification subject line.
- From Name:- it specifies the name of a person or business that the email notification will say it from.
- From Email:- it defines that mail address from where the mail notification comes from.
- Reply-To Email Address:- it specifies which email address you like replies to go from.
- Email Message:- here we get all the information that the user filled or submitted.
11. Customize your confirmations settings
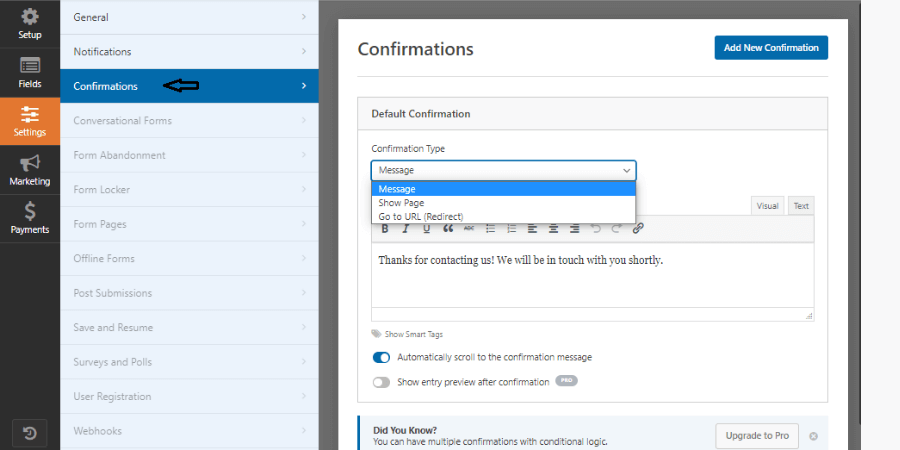
As soon as any user successfully submits the form, he needs to get a confirmation message or etc. so that the user can also get to know that his/her message or queries have been successfully sent. In WPForms, we can customize the confirmation type also like-
- Confirmation Message– any customized success message we can show our user after the form submission.
- Show Page– any customized page we can refer to as the form successfully submitted.
- Go to URL– can redirect to any particular URL after the form submission.
12. Customize more required WPForms settings and then save every setting
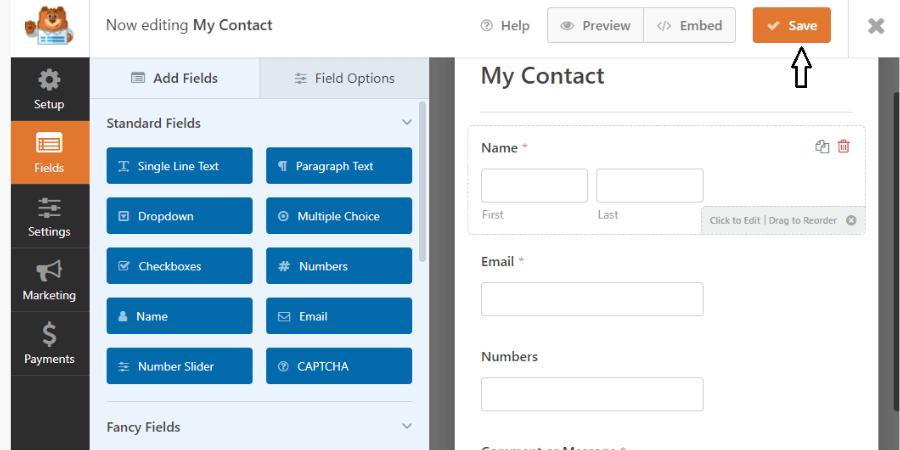
Above mentioned settings, are the most important settings which are must be done, but apart from it more customization you can do too and then click on the Save button.
13. Place your WPForms plugin inside your webpage now
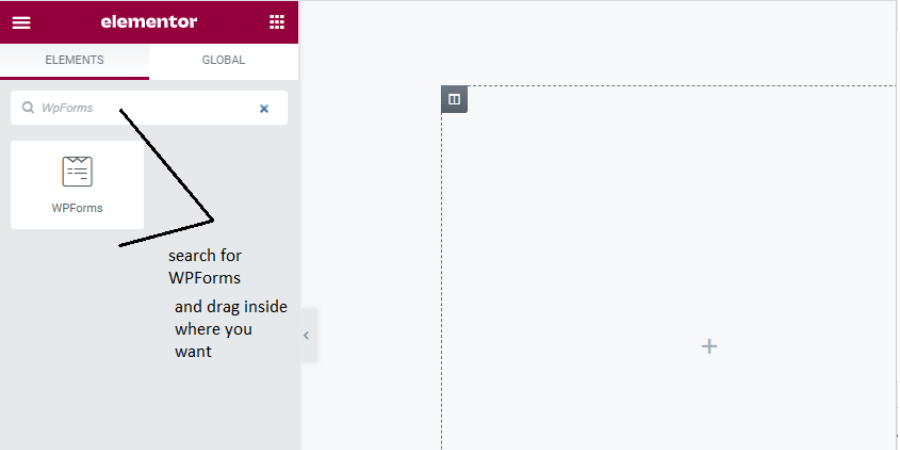
The form which we have thoroughly developed inside WPForms, now we need to include it inside our webpage. As it’s totally up to you, which page builder you are using to design your webpage, but in my case, I am using one of the most popular page builder plugins Elementor. So here you need to search for the WPForms widget inside the Elementor widget and drop it inside your required section or place.
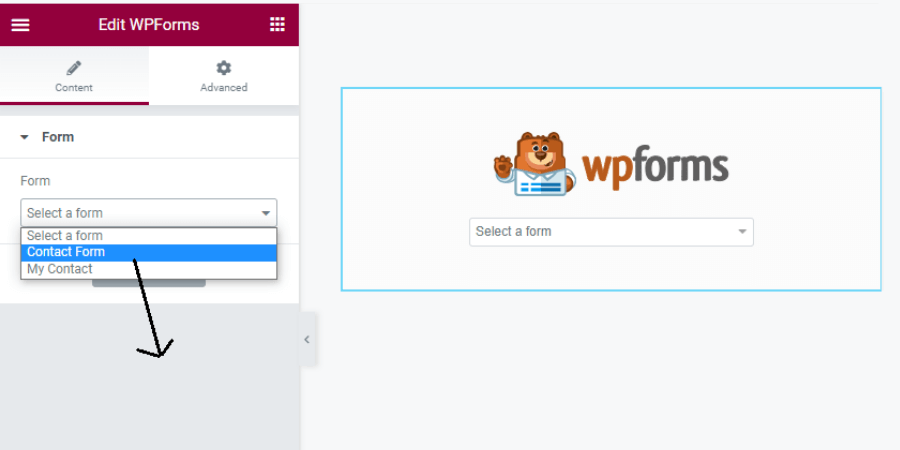
After successfully placing the WPForms widget. Select your designed Form name from the dropdown list.
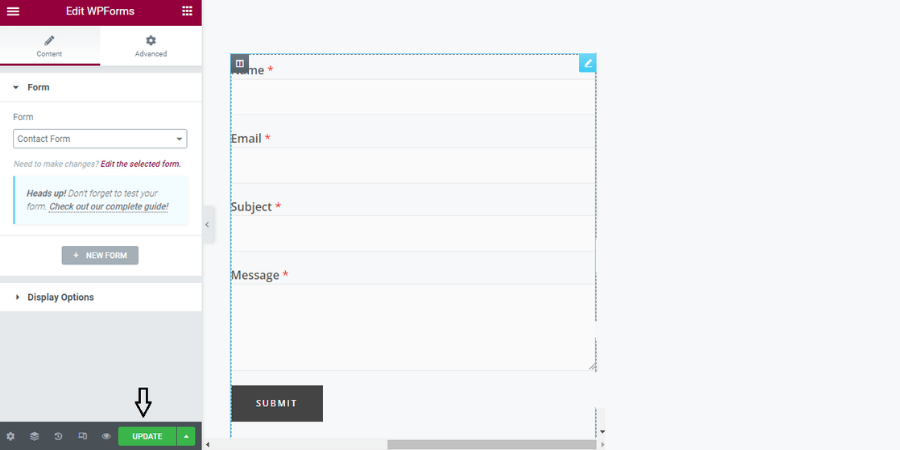
Automatically your designed form will appear here now. You can also able to further customize the form inside the Advanced Elementor settings and update everything then.
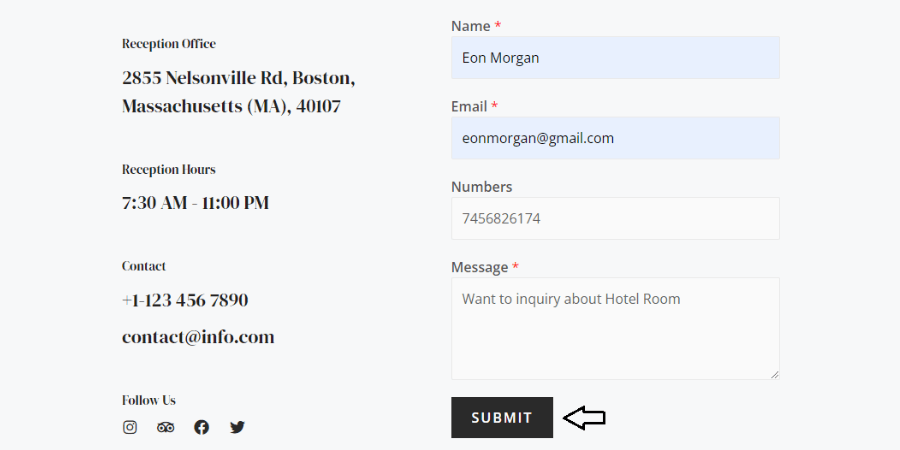
Till now, we have finished every important setting. Now, it’s time to check our form, whether it is been activated or not. And to check this, we need to open our website and then we need to fill-up out the form, and then need to click on the Submit button.
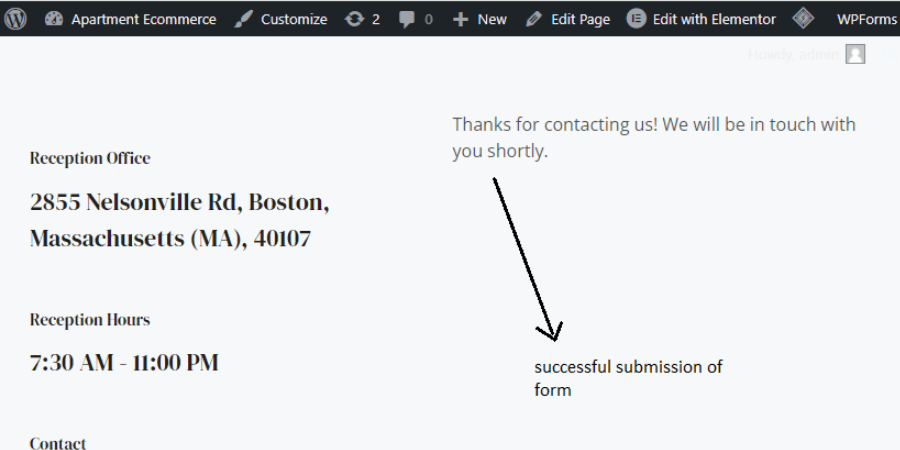
If, the form has been successfully submitted then the confirmation message which we have finalized inside the WPForms Confirmation settings, seems to appear. As, in my case, I had kept the confirmation message saying- “Thanks for contacting us! We will be in touch with you shortly.”. And after submitting the form, I got this same confirmation message too, as shown in the image too.
Now, we need to open that mailbox, where we have decided our form details after submission will drop.
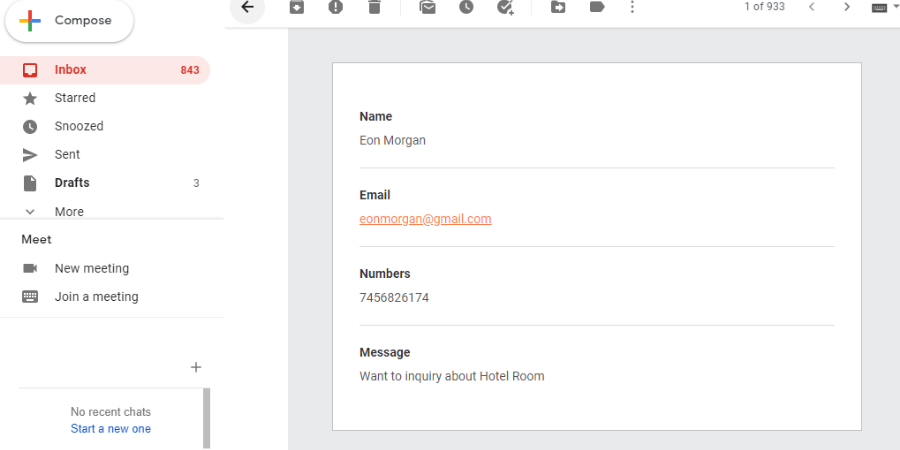
As you can also able to see that we are getting the same details that we have added during the form submission inside our mailbox and this means we have successfully activated our contact form using the WPForms plugin.
Conclusion-
As we have understood above- how to successfully validate and activate your contact form inside the WordPress using the WPForms plugin. If you have followed all the above steps, which I have mentioned then guaranteed your Form has been activated. But if in case, you are getting any sort of problem then feel free to comment to us below.
The step-by-step whole setup of the WPForms plugin is been explained above, but if in case your contact form is still not able to send the mail, because of your hosting then you can visit our this blog post, How to Fix the issue of WordPress contact form not sending mails.
Also, you can visit our other post where we have thoroughly explained the contact form set up or activation settings by using the Contact Form 7 plugin. Visit inside this link- https://babacoder.com/blog/working-contact-form-through-contact-form7-plugin-in-wordpress/, and stay tuned and be with us to learn this most challenging and beautiful coding journey.


